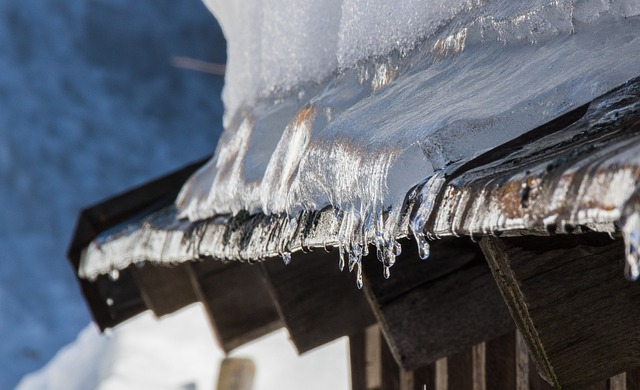
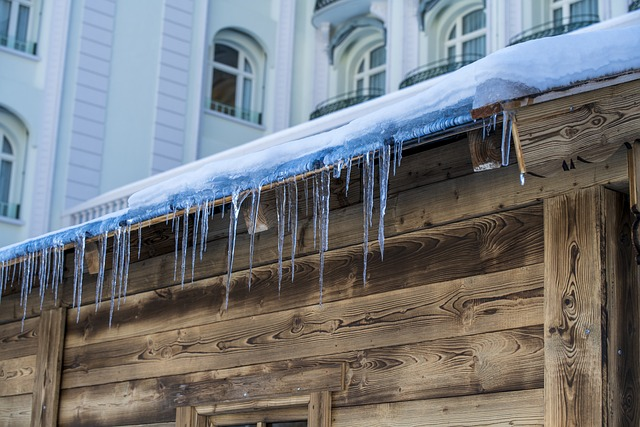
Winter is a beautiful time of year, but it can also bring some serious challenges to homeowners. One of the most common issues is the formation of ice dams on roofs, which can cause costly damage and even pose a safety risk. But fear not, roof melt tablets are here to save the day! These handy little products can help you tackle ice dams and keep your home safe. Curious about how they work and their benefits? Keep reading to discover a comprehensive guide on roof melt tablets.
Roof melt tablets provide an effective and safe solution for preventing ice dams on roofs.
Benefits include improved safety, cost-efficiency, versatility, and convenience.
It is important to select the right formulation of roof melt tablet while being mindful of potential risks to animals/plants & damage caused by corrosive materials.
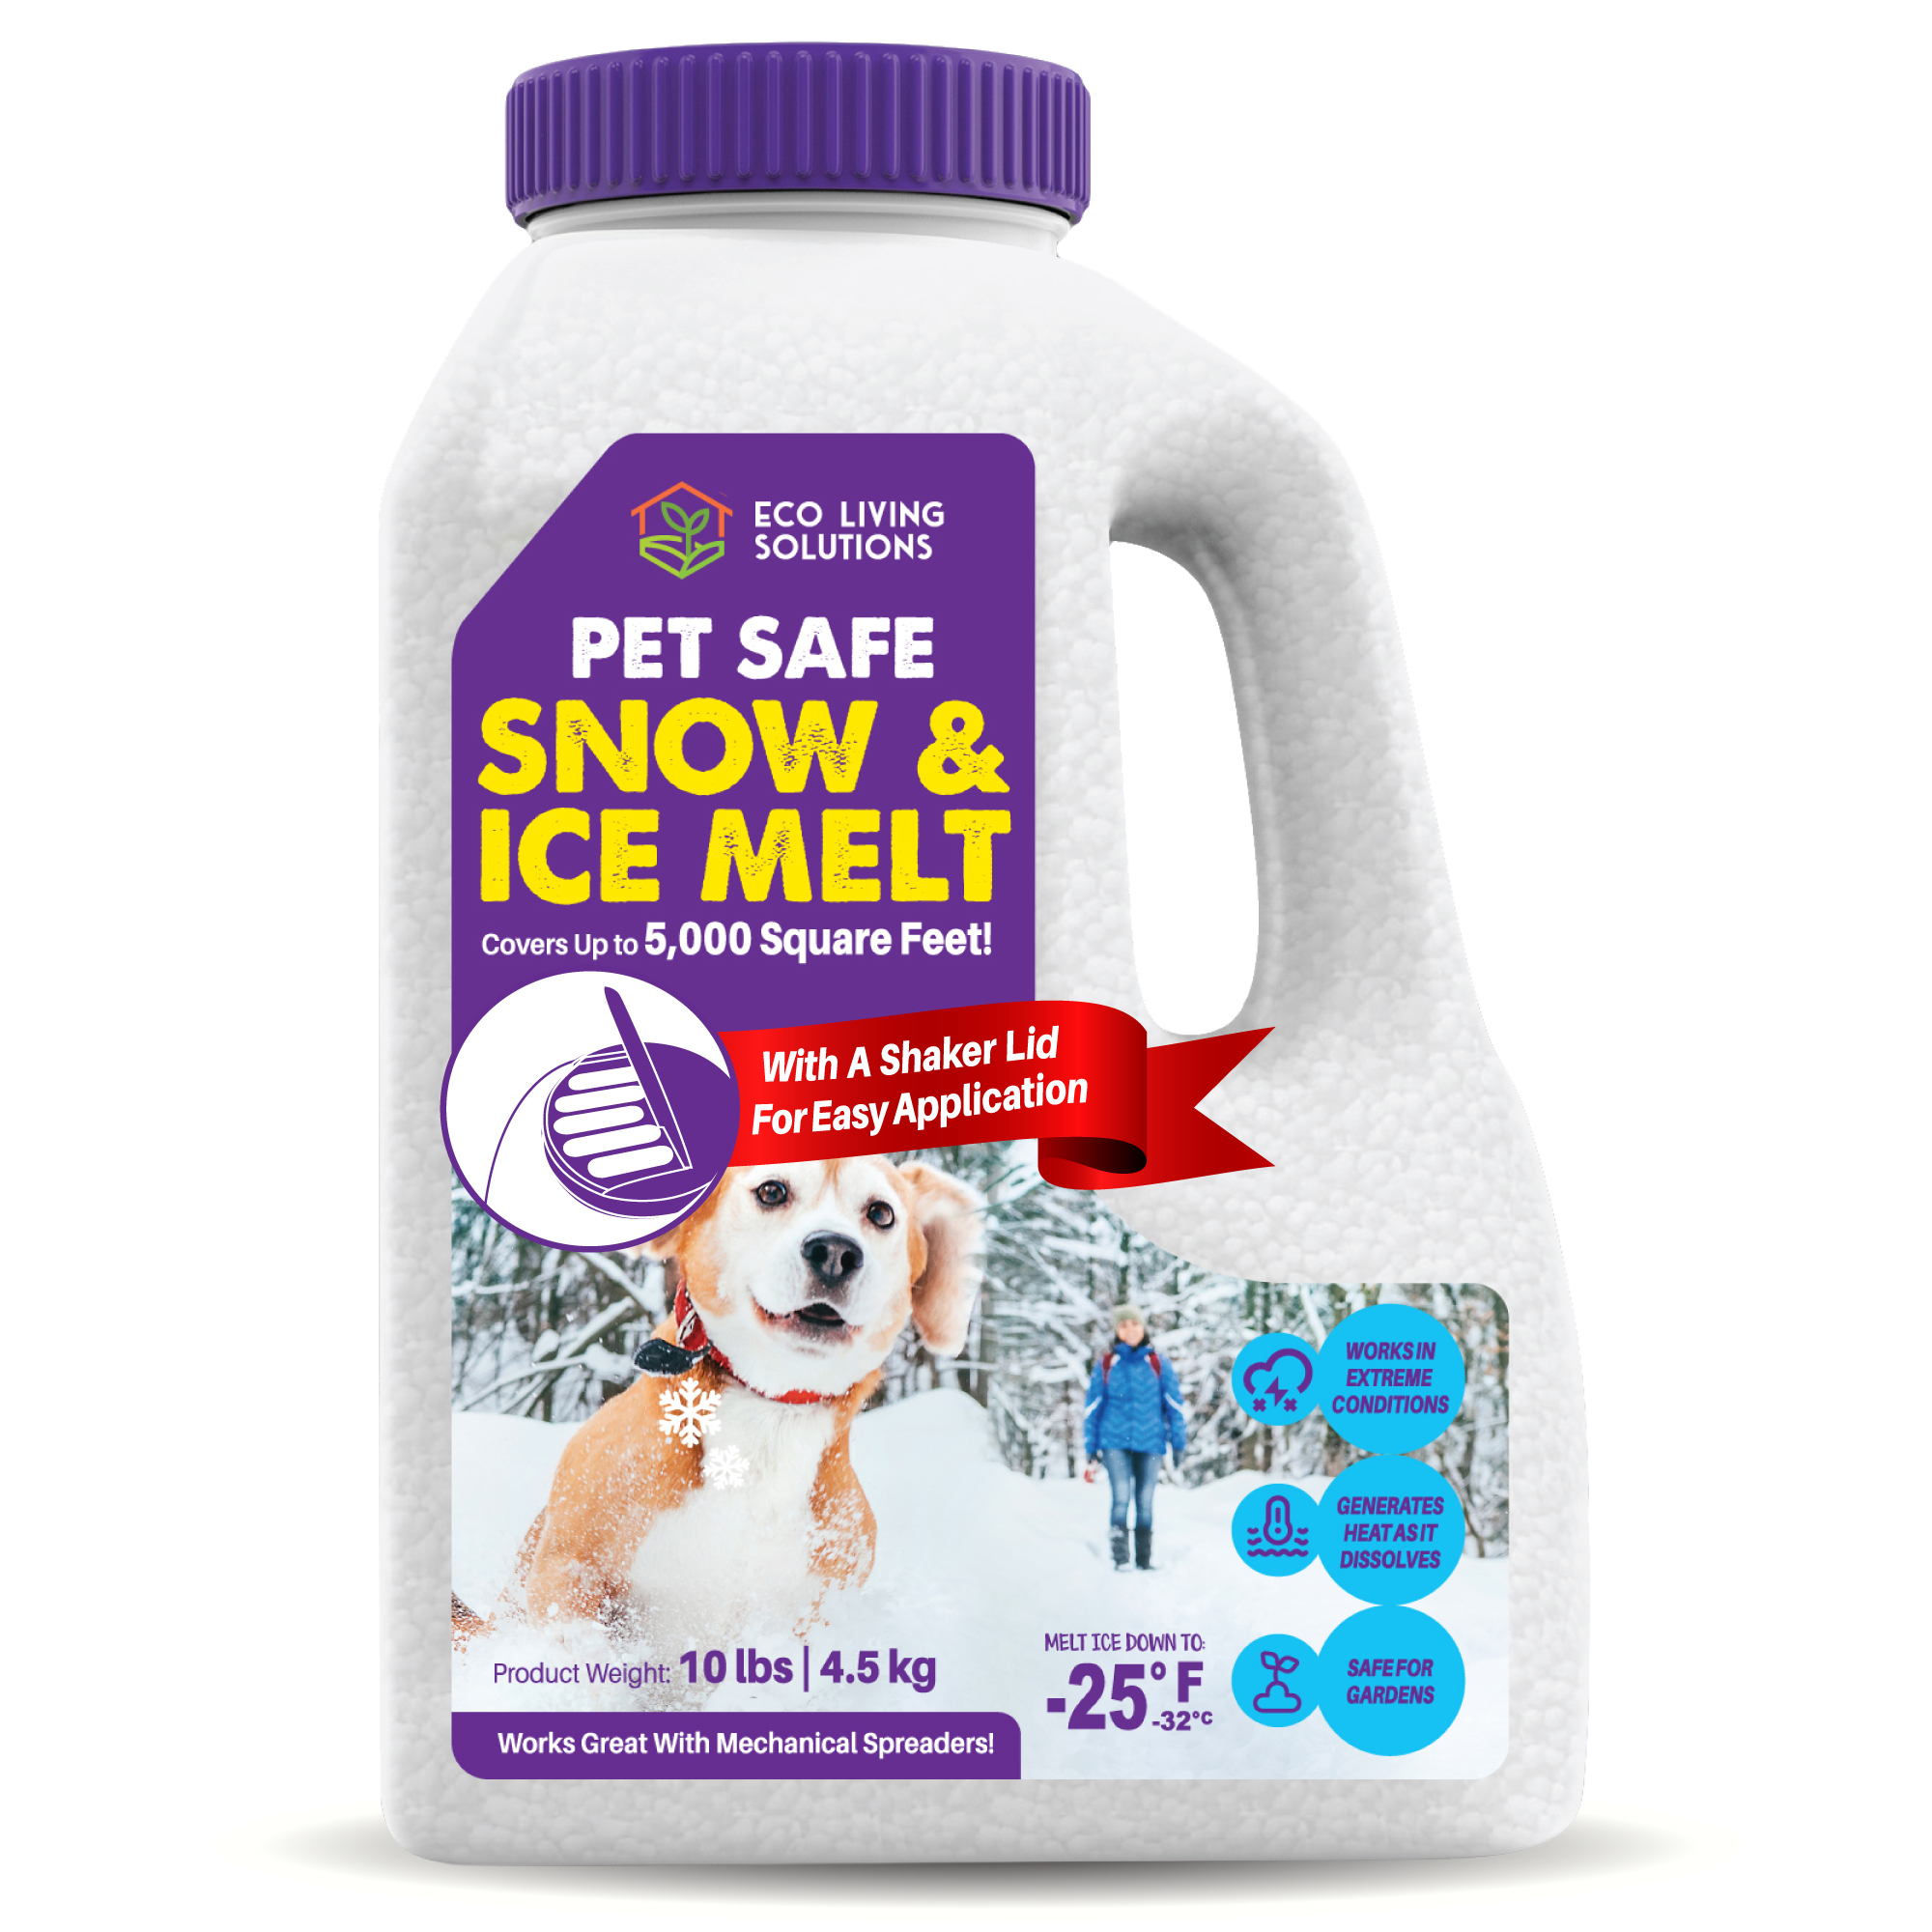
Paragraph 1: Roof melt tablets are chemical-based products designed to melt ice and snow on roofs, preventing ice dam formation. They are easy to use and provide a convenient solution for homeowners to avoid the costly and potentially hazardous effects of ice dams.
Paragraph 2: You might be wondering about their functionality and application process.
Roof melt tablets work effectively due to the chemicals they contain, notably calcium chloride and salt. These chemicals lower the freezing point of water, effectively melting ice and snow. They can also be used to remove existing ice dams.
Operating roof melt tablets is straightforward. Simply follow these steps:
Toss 1 tablet onto the affected area on your roof, gutters, or downspouts.
Let the tablet work its magic.
No need for extension equipment or ladders, making it a safer and more convenient method to address ice and snow accumulation on your roof.
You can simply throw the roof melt tablets onto the targeted area from the ground level. These tablets are formulated with substances like calcium chloride and salt to reduce the freezing point of water, effectively melting ice and snow while minimizing adverse effects on roofing materials.
Roof melt tablets not only prevent ice dam formation but also help with the removal of existing ice dams. By incorporating ice creating relief points, they allow water to drain safely from the roof. This prevents damage caused by trapped water and ice dams, giving homeowners peace of mind.
Roof melt tablets offer more than just ice dam prevention. They offer increased safety, cost-effectiveness, and versatility. Let’s delve into these advantages in more detail.
Roof melt tablets mainly enhance safety and convenience. By eliminating the need for ladders or other extension equipment, homeowners can address ice and snow accumulation on their roofs without putting themselves at risk.
Roof melt tablets also help prevent damage caused by ice dams and trapped water, mitigating the effects to the roof. As the roofs surface roofmelt begins, they ensure that water drains safely from the roof, avoiding costly repairs and potential hazards caused by roof melts.
With ice melt tablets, such as roof melt tablets, you can tackle ice and snow buildup with confidence, knowing you’re using a safer and more convenient method.
Roof melt tablets also stand out for their cost-effectiveness. By using these tablets, homeowners can save money on potential repairs and professional services associated with ice dam removal. A pack of 60 roof melt tablets typically costs between $25 and $30, making it a budget-friendly option compared to hiring professionals.
Roof melt tablets work by melting ice and snow, allowing it to drain safely from the roof as the ice melts. This not only prevents damage caused by ice dams but also saves homeowners from costly repairs and professional services.
Roof melt tablets are a smart investment for any homeowner looking to protect their property and save money in the process.
With a variety of uses, roof melt tablets prove to be a multifaceted solution for ice and snow removal. They can be applied to various surfaces, including:
driveways
sidewalks
gutters
roofs
This means you can use them to tackle ice and snow buildup in multiple areas around your home, with the extension equipment needed for reaching various heights and locations.
The versatility of roof melt tablets makes them a valuable tool for homeowners during the winter months. With just a simple toss, you can effectively remove ice dams from the ground and reduce icicles on roof edges. Roof melt tablets are an all-in-one solution that helps your property stay safe and ice-free.
Despite their numerous benefits, potential disadvantages and precautions of roof melt tablets should not be overlooked. These include possible damage to roofing materials, risks to animals and plants, and the importance of choosing the right formulation.
Paragraph 1: Certain roof melt tablets may harm shingles and other roofing materials, hence selecting a product compatible with your roof type is crucial. For example, sodium chloride-based products should be avoided if there is a considerable amount of metal on the roof.
Calcium chloride-based roof melt tablets, made from calcium chloride, are generally recommended for shingle roofs. However, it is crucial to be aware that these tablets can cause corrosion to roofing nails made of galvanized iron over time and damage tiles and roof shingles due to freeze-induced expansion and contraction.
In addition, roof melt tablets can be toxic to the roof or surrounding vegetation, so it’s essential to choose a product that is safe for your roof and environment.
Paragraph 1: Given the potential risks roof melt tablets pose to animals and plants, opting for a pet-friendly and eco-friendly formulation is advisable. Animals that ingest these tablets risk experiencing mouth ulcerations, tremors and seizures. The cause of this is the increased salt intake. Walking over these tablets may also cause irritation to an animal’s paws.
Formulations made from urea or magnesium chloride are considered the most pet-friendly options. However, ingestion of these 14 lb tablets may still cause an upset stomach in animals.
When selecting roof melt tablets, consider the potential risks to pets and surrounding vegetation to ensure a safe and eco-friendly choice that can be safely eliminated.
Choosing the correct roof melt tablet formulation is key to efficiently prevent and remove ice dams. Factors to consider include temperature and snow thickness. Thorough research and evaluation of various formulations are necessary to choose the most suitable product for your roof and climate.
It’s essential to take the time to research and select the appropriate formulation for your specific needs. By doing so, you can ensure that you’re using a product that will effectively address ice dams while minimizing potential damage to your roof, animals, and plants.
For optimal results with roof melt tablets, following certain guidelines for selection and use is recommended. Reading product labels, proper storage, and handling are crucial steps to ensure success.
Ensure to meticulously read product labels to choose a roof melt tablet that is compatible with your roof type and harmless to animals or plants. Product labels often include information about:
Active ingredients
Application instructions
Safety precautions
Storage instructions
By thoroughly reading product labels and adhering to all instructions, you can ensure that you select the right product for your roof and use it effectively and safely. Don’t overlook this crucial step, as it can make all the difference in the success of your ice dam prevention and removal efforts.
Maintaining roof melt tablets’ effectiveness and preventing accidents or spills calls for appropriate storage and handling. Store roof melt tablets in a cool, dry place away from direct sunlight and moisture.
When handling roof melt tablets, exercise caution to avoid spills and accidents, especially during a ground toss, as they may create a water mixture. Wearing protective gloves and eyewear is recommended for added safety. To ensure proper use, let the water mixture begin by following the manufacturer’s instructions.
By following these storage and handling tips, you can ensure that your roof melt tablets remain effective and are ready to use when needed.
If you seek alternate solutions for existing ice dam prevention and removal, numerous options exist. Proper insulation, ventilation, and using a roof rake to remove snow buildup can all help prevent ice dams and related damage.
Some alternative solutions for preventing ice dams include:
Utilizing heated cables
Increasing attic insulation
Sealing interior airflow leaks and ventilating the attic
Installing metal ice belts or ice belt panels
Each of these methods has its own set of advantages and disadvantages, so it’s essential to research and determine the best solution for your specific needs.
In conclusion, roof melt tablets are an effective and convenient solution for preventing ice dams and removing ice and snow from your roof. They offer several advantages, such as increased safety, cost-effectiveness, and versatility. However, it’s essential to be aware of potential disadvantages, risks to animals and plants, and the importance of choosing the right formulation.
By following the tips provided in this guide, you can make an informed decision when selecting and using roof melt tablets. Keep your home safe from ice dams and the costly damage they can cause, and enjoy a worry-free winter season.
Roof melt tablets work by creating a chemical reaction with snow and ice, melting away the existing ice dam. The melted water then drains from the roof to the ground, allowing snow and ice to be safely eliminated.
Split text into paragraphs: ``` Paragraph 1: Roof melt pucks can be damaging to roofs, as they are corrosive to metal nails and unlikely to work effectively. Paragraph 2: DIY ice dam removal should generally be avoided due to the potential for roof damage.
Yes, roof melt tablets can be used on surfaces other than roofs, such as driveways, sidewalks, and gutters.
Roof melt tablets typically contain calcium chloride and salt, which help to melt ice and snow by lowering the freezing point of water.
Yes, there are alternative solutions to prevent ice dams such as installing heated cables, increasing attic insulation, sealing interior airflow leaks and ventilating the attic, and metal ice belts or ice belt panels.
]]>Using roof melt pucks to remove ice dams and icicles is a great way to prevent injury and property damage. They are also safer than using hot water.
However, many homeowners use ice melt pucks for roof melt incorrectly. This can result in the product being tracked into the house or facility and burning surrounding vegetation.
To ensure roof melt tablets work effectively and to address existing ice dams and icicles while safeguarding your home and surrounding area, you must follow the guidelines.
There are many ice melts on the market that are unsafe for roofs. They contain too much salt or other chemicals that can harm the shingles, gutters, and surrounding landscaping. Some of these chemicals are also corrosive when they come in contact with certain types of metals, such as galvanized iron nails. Instead, it is recommended to use a safe ice melt for roofs, such as calcium chloride, to prevent damage and save you money in the long run. Calcium chloride is not only effective at melting ice but also less likely to harm your roofing materials and other components of your home.
A safe ice melt for roofs contains a special traction agent that offers slip protection and helps prevent falls and injuries. This feature is especially important during snowy weather, when slipping and falling accidents are common. Using such a product, in combination with well-maintained water drains, will help lower your legal liability and keep you and your family safe. Proper water drains ensure that melted ice and snow are efficiently channeled away from your roof, preventing the formation of ice dams and further enhancing the safety of your property.
Many people are confused about which type of ice melt is best for their homes and how much to use. A professional can help you decide which product will be the most effective for your roof and other surfaces on your property. A safe ice melt for roofs, such as an ice dam melter, will also be gentle on your driveway, sidewalk, and patio. This is important because these areas are prone to stains and can become slippery when they are covered with ice, so use the right product, like an ice dam melter, and they will be safely eliminated.
Salt pucks are a popular option for eliminating ice dams, but they can be dangerous and cause more damage than they do good. The salt in these products can discolor shingles and leave a white residue on your driveway, walkways, and home. In addition, salt can corrode roofing nails, causing them to rust and weaken the hold on shingles. Instead of risking your safety, choose a natural roof ice melt, such as Safe Paw or roof melt tablet, that is gentle on asphalt, concrete, copper, and other materials.
Using roof melt pucks is a straightforward process. First, stand on the ground at a safe distance from the problem area. Then, simply toss the roof melt pucks onto the icy or troublesome surface. Once they make contact with the ice, it begins working immediately to melt the ice, providing an effective solution to create a safer environment for your roof and surroundings.
There are many ice melts on the market that are unsafe for roofs. They contain too much salt or other chemicals, like roof melt tablets, that can harm the shingles, gutters, and surrounding landscaping. Some of these chemicals are also corrosive when they come in contact with certain types of metals, such as galvanized iron nails. Using a safe ice melt for roofs, like an ice dam melter, will protect your home from unnecessary damage and save you money in the long run.
A safe ice melt for roofs contains a special traction agent that offers slip protection and helps prevent falls and injuries, making it an effective water mixture for icy surfaces. This feature is especially important during snowy weather, when slipping and falling accidents are common. It will help lower your legal liability and keep you and your family safe.
Many people are confused about which type of ice melt is best for their homes and how much to use. A professional can help you decide which product will be the most effective for your roof and other surfaces on your property. A safe ice melt for roofs will also be gentle on your driveway, sidewalk, and patio, preventing stains and slipperiness when covered with ice.
Salt pucks are a popular option for eliminating ice dams, but they can be dangerous and cause more damage than they do good. The salt in these products can discolor shingles and leave a white residue on your driveway, walkways, and home. In addition, salt can corrode roofing nails, causing them to rust and weaken the hold on shingles. Instead of risking your safety, choose a natural roof ice melt, such as Safe Paw, that is gentle on asphalt, concrete, copper, and other materials.
Ice dams are a huge problem for homeowners, and they need to be dealt with before they cause roof leaks. Luckily, there are several ways to break them apart and melt the ice. One popular method is to use a throwable ice melt puck, like this one from Eco Living Solution. It’s eco-friendly and contains Calcium Chloride that works effectively to melt ice and snow without leaving any stains on concrete or the surrounding area. It also doesn’t have toxins that can harm pets if they accidentally ingest it.
Using ice melt pucks is safer than other methods, such as throwing salt on your roof. While this may work, it can be dangerous for people walking around the house or property and can damage the roof shingles. In addition, the salt dripping from the roof can damage sidewalks and driveways. The best way to avoid this is to buy a good quality ice melt and apply it properly.
Many homeowners are guilty of using ice melt incorrectly. They often use too much or don’t know how to correctly spread it. This can lead to a messy, unsightly, and un-effective result. It’s important to read the instructions on the product to ensure that it is used safely and efficiently.
Another common mistake is waiting until the last minute to use ice melt products. This can lead to a lot of wasted money and effort. It’s recommended to purchase ice melt before the snow falls, so you’ll have it on hand when you need it. It’s also a good idea to get a rake, steamer or another tool to remove snow and ice before it piles up too high.
Using roof melts pucks on your home’s roof is more affordable than hiring a contractor to remove ice dams. These products thaw and drain trapped water from the roof to avoid ice dam formation, and they can also prevent ice dams from damaging your gutters and home’s insulation. They also provide a safer solution than traditional rock salt, which can damage shingles and harm the plants beneath them.
Existing ice dam can cause serious issues for homeowners, including flooding in the home and roof leaks. They can also tear off gutters, cause shingle deterioration, and destroy insulation. In addition, they can pose a safety hazard for those who walk around a home, especially if they are unattended. There are several ways to prevent ice dams, including removing them with a high-powered steamer or installing extra insulation in the attic. However, one of the most effective ways to eliminate ice dams is by using a roof de-icing cable.
Many people use salt pucks to get rid of ice dams on their roofs, but they can do more harm than good. The calcium chloride in the pucks can discolor shingles and ruin the look of your home. They can also corrode galvanized nails, which can minimize their ability to hold up shingles and other roof components.
Roof melt pucks are an environmentally friendly solution to prevent ice dams from forming on your roof. They work fast to break up ice and help snow melt off your roof before it forms into a dangerous icicle. They are also safer for pets and people than rock salt, which can be harmful if ingested. They are also less damaging to concrete, pavements, and grass. Unlike other deicing products, they don’t contain any chlorine or salt and are safe for all plants.
Many homeowners use ice melt salt to clear their gutters and driveway, but this can damage the asphalt, cement, shingles, and other parts of the home. It also can discolor your roof and erode the soil underneath. Salt can also damage trees and shrubs, and the runoff can discolor walkways. Fortunately, there are many alternative ways to avoid these issues.
One option is to replace ice melt salt with roof melt pucks, which are designed specifically for the unique needs of your home’s roof. These pucks are made of calcium chloride, which works faster and more effectively than traditional rock salt. They are also safer for plants and pets than ice melt salt, and they can be used in areas where there are paved surfaces or sidewalks.
]]>Increasing calcium hardness levels in your pool and hot tubs is essential to prevent damage to your pool and hot tub surface and equipment. The optimum calcium hardness level is 200-400 ppm.
Unlike baking soda, which does not increase calcium levels, most calcium hardness increasers contain the chemical calcium chloride. They are usually sold in granular form that you can purchase in a pool chemical supplies store.
Maintaining ideal levels of calcium hardness in your pool hot tubs and spa water is an essential aspect of proper water chemistry. Like pH and total alkalinity, calcium content can become a source of problems when it gets out of balance. For instance, when calcium levels get too low, your pool becomes cloudy and corrosive and will cause damage to your pool surfaces and equipment. To prevent this, a pool owner will use a calcium hardness increaser to boost the levels of this mineral. These products are available in a wide variety of forms and are generally composed of the compound calcium chloride.
The best way to determine whether your swimming pool is in need of a calcium hardness increaser is by using a test kit. Most testing kits come with a strip that can be used to measure the level of calcium in your water. Simply remove the strip from the water and compare the color of the strip to the color chart provided with your kit. The results of this will indicate if you need to raise calcium hardness.
You should also note that baking soda, which many novice pool technicians mistakenly believe will raise calcium hardness levels in your water, actually does not do this directly. Instead, it will indirectly affect the total alkalinity and pH levels, which do impact calcium levels. Making your pool water unstable.
When looking for a product to boost your pool water calcium hardness, the most cost-effective option is to use calcium chloride. This is a dry, granulated chemical that can be purchased in large amounts at most swimming pool supply stores. This option will typically cost you around $40 per 15-pound bag.
When you are ready to apply this product to your pool water, be sure to wear pool equipment such as a respirator and safety glasses when handling it. This is because it has an exothermic reaction and generates heat when it reacts with the water. It is also a good idea to test your pool's water before applying it so you know exactly what levels are in the water and how much you need to add. This will help avoid any surprises and save you money in the long run.
While it may seem odd, calcium content needs to be actively managed (along with pH and total alkalinity) to keep water in proper chemical balance. Ideal levels are 200-400 parts per million, or ppm. If calcium levels are too low, they can damage your pool potentially causing pool corrosion. Unfortunately, it's not as easy to lower calcium levels as it is to raise them. Most methods require partially draining and refilling the pool, which pumps out the existing calcium-rich water and replaces it with tap water containing very low levels of calcium. This is done until the balanced calcium hardness level is achieved.
This can be expensive, and it's still not guaranteed to get your calcium level back to the desired range. The best way to do this is to use a calcium hardness increaser, which raises calcium levels with granular calcium chloride. These are available from most swimming pool retailers in buckets.
You should test your water before using a calcium hardness increaser. A typical test kit includes a vial of water, a calcium reagent and a hardness indicator. The reagent turns the solution pink, and you add the indicator until the color changes to blue. You then count the number of drops of titrant used to reach the endpoint, and multiply that by 10. The result is your water's calcium hardness. This should indicate that it you need to adjust your calcium hardness levels with your pool water.
To test your pool water, pour some of the water from your pool into the vial and mix well. You should then add the reagent and indicator, and follow the instructions in the kit. Occasionally you may experience a purple endpoint instead of the expected blue. This is most likely caused by interference from metal ions in your water (from algaecides, pipes or the source water) and can be corrected by adding five to six additional drops of the titrant.
To use the calcium hardness increaser, spread it evenly over the surface of your pool and allow it to dissolve while circulating. You shouldn't predissolve it, as this generates heat and can burn your skin. Some people prefer to use a sock or glove when applying it, as this helps avoid burning your hands. Follow the product instructions for dosing, and always retest your water after treatment to ensure that it is within the proper range. After each application you can test your calcium hardness levels.
While chlorine, pH and total alkalinity may be more commonly known pool chemistry factors, calcium hardness also needs to be actively managed to keep water in proper chemical balance. Keeping calcium hardness levels between 200-400 ppm is important to the health of your pool or spa surface and equipment. If your pool is not properly managed, it will cause corrosion seeking out calcium by dissolving it from surfaces it comes into contact with, such as plaster, concrete, tile grout and metal, causing the formation of scale, and creating corrosive water that destroys metal parts.
As with any chemical addition, it is important to take precautions read the manufacturer's instructions and follow them closely. In general, calcium hardness increasers come in liquid or granule form and are mixed with water to make up the solution before being added to your pool or hot tub. When mixing dry chemicals, it is recommended to use a large nonmetallic bucket filled with water and to add the dry product to the bucket of water rather than throwing it directly into your pool. This is because dry chemicals and salt tend to get very hot when they dissolve, and this can cause burns if not handled correctly.
Once the product is mixed, it can be added to the pool or spa according to manufacturer's directions. The ideal hardness level for your water is determined by comparing the color of a water sample to the chart provided with your test kit. Once the product is added, it is important to turn jets ON and to circulate the water a minimum of 20 minutes. This is important as it will distribute the mixture in the pool.
As with any chemical addition, it is essential to monitor your water daily and to record results in a chemical log book or digital pool system so that you can quickly make necessary adjustments to the pH, chlorine, total alkalinity and calcium hardness. Since the calcium hardness level doesn't fluctuate as much as pH or chlorine, it is easier to manage and maintain with less frequent testing. However, if your water is not properly maintained, even one bad day can result in a lot of damage.
Aside from pH, total alkalinity, and chlorine, calcium hardness is one of the most important factors in swimming pool chemistry. It’s also the most costly water factor to manage because it can easily become unbalanced and cause expensive damage. In addition to affecting the condition of surfaces and equipment, low calcium hardness can also corrode metals in pool or spa plumbing and piping.
When calcium levels are too low, water can be strong and becomes hungry and seeks to “eat” or dissolve anything it can that contains calcium. This can include cement, plaster, plaster surfaces paint, filter and metals in pool and spa plumbing. The end result is brittle, deteriorated surfaces and equipment, which can cost thousands of dollars to repair or replace.
High calcium levels can be equally problematic, particularly if the water is hot. This is because calcium’s solubility inversely proportionates to temperature; as the water heats up, less of the mineral can stay dissolved. Unbalanced calcium levels in a heated pool can lead to scale formation on equipment, surface finishes, and piping. The crusty, grayish white calcium sludge that forms is unsightly, can clog filters and snag bathing suits, and makes it difficult for water to flow through.
The best way to avoid these issues and enjoy your pools is to actively manage calcium levels with a reliable test kit and a quality calcium hardness increaser. These chemicals are inexpensive and easy to use, and they help ensure a proper range for your water’s chemical balance.
While many novice pool technicians assume that a ‘calcium hardness reducer’ will remove calcium from the water, this isn’t possible. These products work by using chemical bonds to bind up the calcium temporarily. When the chemicals break down, the calcium is released back into the water and you’re right back where you started! To properly raise calcium levels, you need to add more of the product. To achieve the recommended calcium level.
By maintaining the ph balance of your pool water. You will get to enjoy the benefits of stain control, scaling, correct total hardness level and avoiding costly repairs and chlorine products.
]]>Ice dams form when snow melts and then refreezes at the colder roof edges. They prevent melting snow from draining off the roof, causing a troublesome water mixture begin to accumulate. This trapped water can cause serious water damage inside the home, leading to a host of problems.
Icicles may be pretty, but they are usually a sign that your gutters are full of ice and unable to move snow and water away from the house. Learn more about how to eliminate ice dams safely and effectively, ensuring that water drains away from your roof and doesn't wreak havoc inside your home.
To prevent damage to the existing ice dam, it's crucial to begin the roof melt process as soon as possible. Ice needs to be safely eliminated and create a water mixture, you can help ensure the availability of a clear drainage path for melting snow and ice. This proactive approach not only protects your roof but also safeguards your home from potential leaks and structural issues caused by ice dams.
A pack of roof melt tablet typically costs $25 to $30 and can last all winter, compared to the cost of hiring a professional to remove an ice dam. Roof melt tablets work also on driveways, gutters, sidewalks, and other areas of the property that experience a buildup of ice. Roof melts are also safe for pets and plants and won’t damage the surfaces of shingles, asphalt, brick, concrete, or metal.
Roof melts are a versatile and cost-effective choice, and they won't harm the surfaces of shingles, asphalt, brick, concrete, or metal. Simply toss these tablets where needed, and they'll get to work.
When an ice dam forms, water produced by melting snow can't escape the roof. This water backs up into the house, causing leaks in walls, ceilings, insulation, and more. The best way to eliminate ice dams is to use a roof de-icer, like the roof melt tablets, that is safe for the surface of the roofing materials. These tablets, with added traction, provide an ideal solution to this problem, allowing you to safely remove ice dams from a distance without the need to climb on a slippery roof.
Many supermarkets, hardware stores, and home centers sell ice melt products. However, not all of them are safe for a roof and may damage the shingles and gutters. Opt for a roof-safe ice melt, which is free of salts and harmful chemicals. The best roof ice melt is color-coded so you can easily see where you have placed it. It should also provide traction to prevent slips and falls, which are common during snowy periods.
Other ice dam removal methods include using a roof rake or hiring a pro to manually scrape off the ice. However, these options can be time-consuming and expensive. The next best option is to use a specialized product, such as an ice dam melter, that melts the ice and creates channels for water to drain safely away from the roof and the surrounding area. These products are usually safer for roofs than other types of ice melt and can be purchased online or from local retailers.
Another effective method for eliminating ice dams is to install heat cables. These are high-resistance wires that you mount on the edge of your roof in a zigzag pattern and plug into an outdoor GFCI receptacle. They work by heating the roof to equalize its temperature and prevent ice dams.
When it comes to ice melt for roofs, there are many different options. Some are more harmful than others. For example, calcium chloride products can corrode the metals in your gutters and downspouts as well as the aluminum siding on your house. They may also erode your roof’s nails and shingles. Some even contain chlorine that can cause damage to your grass and plants around your home or garden. On the other hand, urea-based ice melt for roofs is safe to use.
Ice dams are a homeowner's worst nightmare. Not only are they unsightly, but they can also lead to potentially costly roof damage and water leaks within the home if left unaddressed. Moreover, ice dams can pose dangers to people walking or driving around the property. Attempting to break them with a hammer or chisel can chip away at your shingles, further endangering your roof's structural integrity and potentially resulting in even more costly repairs.
Most ice dams form when snow melts and then refreezes at the eaves of the house. This occurs because the warm house heats up the snow on the top of the roof, melting it and causing it to flow down toward the eaves in sub-freezing temperatures. However, because the eaves are colder, the melted snow quickly refreezes as it approaches the eaves. This creates a buildup of ice and snow that will eventually result in a water spot on the ceiling or a drip at the base of the wall.
A safe and effective ice melt for roofs will eliminate these dams by creating channels through the ice that allow the water mixture to begin safely draining off the roof. This is crucial for preventing leaks and maintaining the structural integrity of your roof. Many ice melts for roofs feature color-coded pellets that are easy to spot and apply evenly. The best part is that you don't have to venture onto your roof to apply the product, making it both convenient and safer for homeowners. Additionally, most ice melt for roofs includes traction agents that prevent slips and falls on slippery surfaces. This is an especially important safety feature for households with small children or elderly family members.
The ice melt products that are available at your local hardware store do not always work on roofs, especially when they're thrown too generously. Often, they stain the surface of the roof and cause corrosion to the fasteners, gutters, and flashing of the home. They can also damage any heating cables that may be in the roof. These chemicals are also harmful to the surrounding plants and can wash into the ground, where they contaminate waterways and sensitive wetlands.
Fortunately, there is now a product that can be safely used on the roof and in the gutters to prevent ice dams and other problems. It is called "ROOF MELT" and works effectively in temperatures down to -13 degrees Fahrenheit. It is also less corrosive than several other ice melts, and it is better for the environment. It's easy to apply, and it comes in a bucket with a convenient scoop.
While most ice melts contain calcium chloride, the hygroscopic compounds in roof melt actually attract moisture, and they melt snow faster than rock salt that it begins working within the hour. The result is a more efficient way to melt snow and ice and prevent the formation of damaging ice dams. The ice melt product is safe for pets and the environment, and it does not leave behind a slimy residue. It is effective in cold temperatures and can be applied to sidewalks, driveways, and porches as well.
It is important to remember that it is still hazardous to climb a ladder and get up on the roof during a snowstorm, so you should only use ice melt on the roof if it's safe to do so. The ice melt tablets are easy to use, just simply toss it and will start working within an hour. You should only need to apply them once per storm, and they will last for up to 72 hours.
You should always follow the instructions on the ice melt you're using, because overuse can harm your plants and even kill them. If you use a large amount, it's a good idea to sweep or shovel up any extra to keep it from reaching the plants in the surrounding area. This is especially true for ice melt that comes in tablet form especially roof melt tablet. The round pellets can pierce and bleed the paws of your pets, so be sure to keep a bag of pet-safe ice melt near your ladder for quick access in case of an emergency.
ROOF MELT is the safe, non-toxic solution to prevent existing ice dam from forming on your roof this winter. This ice melt is made from ingredients that come from nature, and it’s friendly to pets, plants, and the environment. It also doesn’t leave a slimy residue like some other ice melts do. It’s easy to use too – you can place it in a stocking and throw it on your roof. It works fast to help you avoid ice dams, and it’s also safe for your roof, gutters, flashing, and other roofing materials.
To combat the ice dam issue, it's essential to begin the process of roof melt. This involves using specialized methods or products to melt the ice and create a water mixture. As the ice dam melts, it transforms into liquid water, which can then drain away from your roof through proper drainage channels. This prevents trapped water from causing damage to your home's structure and helps maintain the integrity of your roof.
Ice dams are a common issue that occurs when snow accumulates on your roof. As the warm roof surface heats up, it causes the snow to melt. However, once the melting snow reaches the colder gutters and overhangs, it freezes and transforms into a formidable ice dam. These ice dams can trap water behind them, exerting significant pressure on the structure of your house or building and potentially leading to serious roof damage.
To avoid ice dams, you should use a roof melt that’s effective in all temperatures. You can find melts that can handle even the iciest conditions, such as Safe Melt. This ice melt is environmentally friendly and contains calcium chloride instead of rock salt, which is bad for your roof shingles and can also cause damage to your trees and shrubs.
Another thing to consider is the safety of your family and pets when using ice melt. Most ice melt products contain harsh chemicals that are harmful to pets. Some ice melts are even abrasive and can irritate the paws of your pets. Some of these ice melts can also kill grass and shrubbery, which can be a big problem for your yard.
To safeguard your roof and effectively address the ice dam issue, roof melt tablets containing calcium chloride can be applied. These tablets work by initiating a controlled melting process, allowing a water mixture to begin forming. As the ice begins to melt, it is safely eliminated, and the water drains away from the roof. This process helps prevent damage to your roof and ensures that it can continue to work effectively.
This is why you should choose a roof melt that’s pet-friendly. Pet-friendly ice melts don’t have toxic ingredients that can harm your pets. They’re also safer for the environment and your roof, and they’re not as abrasive as rock salt. They’re also easier to spread than traditional ice melts, and they don’t clump up into hard masses.
Using an ice dam melter is an effective way to address the leaky winter issue. When applied, this product ensures your roof melts the ice dam, allowing water mixture to begin forming. This process typically begins working shortly after application, preventing wallowing water from causing damage. Please note that product availability may vary, so it's important to check if it's valid in-store or online before you purchase.
]]>RM18 is used as total weed control solution for unwanted brush, broadleaf plants and grass. This spray kills tough weeds quickly and leaves fertile soil for planting flowers.
A combination of glyphosate and diquat, RM18 starts to kill weeds on contact, producing visible wilting within 12 hours. Kudzu, wild blackberry, poison ivy, poison oak, crabgrass and dandelions (and over 100 other plants) are no match for this glyphosate based weed killer.
Strike 3 is a close cousin to RM18, but the competition is stiff. This triple whammy of a herbicide combines the trifecta of 2,4-D, mecoprop-p and dicamba into a one of a kind blend that delivers systemic weed control on a grand scale. It’s the best weed killer to have your back and is the gold standard in keeping your turf, flowers, shrubs and plant vegetables looking their best. Besides, it’s no secret that you need to keep your lawn in tip top shape for your neighbors and visitors alike to enjoy your hard work. The question is which weed killer is the right fit for you?
RM18 is an effective product that can be used to destroy the toughest weeds and broadleaf plants for both cool season turf and warm season turf. It is a fast acting herbicide that can be used to remove tiny weed seedlings and big plants in the garden. It takes only 12-14 days to show evident results, which is fast in comparison with other herbicides.
rm18 is used for lawn replacement, leveling and clearing walking paths, killing weeds along fence lines and backyard buildings. It kills the weeds without harming your desirable lawn grasses.
This weed killer is also rain-resistant in around thirty minutes and it is effective for up to 6 months. It is a combination of two herbicides, glyphosate and diquat.
It is ideal for killing the toughest broadleaf weeds on turf, including wild violet, ground ivy, oxalis and clover. It is also great for suppressing young and actively growing yellow nutsedge.
This weed killer works on hard to kill weeds and grasses on a permanent basis, so you can enjoy your yard season after season. It is especially great for prepping asphalt driveways, patios, and tennis courts. It can also be used to control weeds on fence lines, retaining walls and mailboxes.
When weeds are out of control, you need a product that can handle the situation quickly and easily. RM18 is the answer, as it offers fast results in a single application. Its two active ingredients, glyphosate and diquat, start to kill hard to control weeds on contact, producing visible wilting within 12 hours. It can also kill kudzu, poison ivy, wild blackberry and many other unwanted plants. This weed killer is rainfast in 30 minutes, so it can be used to spray areas that need to be accessible for pets or people after the treatment has dried.
Strike 3 is a systemic shoots-to-roots weed control solution that can be applied to residential and commercial lawns, sod farms and other noncrop areas. It controls a variety of common annual and perennial broadleaf weeds, including dandelions, clover, henbit, plantain and foxtail. It also helps keep bluegrass and other sod-grown grasses from being overrun with weeds. It mixes easily with certain irons and fertilizers to control weed growth while helping maintain healthy lawns and turf. It can be applied with a spreader or sticker and penetrates weeds even better when combined with WF Wick adjuvant.
RM18 and T Zone are popular weed killers used by homeowners and farmers to control weeds. However, while these products can be effective in controlling weeds, they also have their disadvantages. In this article, we will discuss the disadvantages of using RM18 and T Zone weed killers.
RM18 weed killer contains glyphosate, a potent herbicide that can be harmful to the environment and human health. Glyphosate has been linked to several health problems, including cancer, kidney damage, and birth defects. It is also toxic to bees and other beneficial insects, which can have a significant impact on the ecosystem. Moreover, glyphosate is non-selective, which means it can kill both weeds and desirable plants. This can be a problem if you accidentally spray it on your lawn or garden.
T Zone weed killer is a combination of several herbicides, including 2,4-D and dicamba. These herbicides can be effective in controlling weeds, but they also have their drawbacks. 2,4-D has been linked to health problems such as cancer, while dicamba can be toxic to wildlife and cause damage to non-target plants. Moreover, T Zone can only be used on certain types of grasses and can be ineffective on some weeds.
Another disadvantage of RM18 and T Zone weed killers is that they can be harmful to the environment. These products can contaminate soil and water, which can have a negative impact on the ecosystem. They can also harm wildlife, such as birds and fish, which can be exposed to the herbicides through contaminated food or water sources.
Furthermore, these weed killers can be expensive and require multiple applications, which can add up quickly. This can be a problem if you have a large area to treat, as it can become costly over time. Moreover, if you do not apply these products correctly, they can be ineffective in controlling weeds, which can result in wasted time and money.
In conclusion, while RM18 and T Zone weed killers can be effective for most weeds, they also have their disadvantages. These products can be harmful to the environment, human health, and wildlife, and they can be expensive and require multiple applications. It is important to weigh the pros and cons of these weed killers and consider alternatives, such as manual weeding or natural weed control methods. Additionally, if you do choose to use herbicides, always follow the instructions for use and safety guidelines provided by the manufacturer to minimize the risks and reach ideal outcome.
]]>St Augustine grass is a blue-green lawn that thrives in warm, moist conditions. It's an extremely popular turf choice around the world.
However, your lawn is susceptible to various types of broadleaf weeds. Fortunately, there are several best control methods available that can help eliminate them from your lawn; these include herbicides and other weed control solutions.
There are several ways to control weeds on your st augustine grass lawn, but the most effective option is using an organic weed killer. By opting for organic treatment, you won't use any harsh chemicals on your yard which is better for your health, the health of your pets, and family members alike.
Selecting the ideal weed killer for your situation depends on several factors, such as where you live and the types of weeds that are growing in your lawn. For instance, if there are numerous broadleaf weeds taking over, opt for an organic product that won't harm grass.
Pre-emergent herbicides can be applied in the early spring and fall to prevent weeds from sprouting before they have a chance to take root. They also work on existing weeds to stop their growth or spread.
Corn gluten meal, which is a natural protein found in the endosperm of corn kernels, has proven to be an effective preemergent herbicide. It inhibits root formation for common broadleaf weeds like dandelions and grassy weeds like crabgrass and keeps your lawn healthy and green by stopping its growth.
Pre-emergent weed control products can be purchased at most local gardening supply stores and should be applied before seeds germinate. Some pre-emergent herbicides require more than one application during a season, so check the label for instructions on when and how often to apply them.
Another option for controlling weeds in your st augustine grass lawn is citrus oil, which can be diluted with compatible ingredients to create an organic weed killer that works effectively on various common weeds, and plants. Citrus oil acts as a powerful solvent, breaking down waxy coatings on weeds and leaves to break down tough weeds such as nettles, dandelions, and sodweed with ease. The major downside of using citrus oil to kill weeds is that the product is non-selective, meaning that it will eliminate all manner of weeds and grasses that it comes in contact with. This means that unless you are careful about where you spray it, you might end up with brown and dead patches in your st augustine grass. And while this may not be a total disaster, it may make your whole augustine lawn a bit unsightly while the grass regrows in that area.
Other natural weed killers include baking soda, borax, and liquid soap. While these are all effective options for controlling weeds naturally, caution should be exercised when using them since they can damage soil, water, and root zone. For instance, baking soda and borax both deposit boron into the soil which is toxic to plants; on the other hand, liquid soap is safe to apply directly onto lawns and will effectively eliminate most types of weeds.
White vinegar is widely used to kill weeds because it quickly and effectively eliminates tough-to-kill grass weeds and many broadleaf weeds. Plus, it works great for eliminating grubs and other pests from your grass without using harsh chemicals which could be hazardous to humans, pets and the environment. One major downside of using white vinegar to kill weeds - is that it may require a second application a few weeks later, to completely eliminate the problem.
However, be sure to follow the directions on your weed killer carefully or it could damage your St Augustine grass lawn. If you have young children or animals in the home, use a safe weed killer for St Augustine grass that does not contain harsh active ingredients.
Weeds can be a major issue for lawn owners who strive to achieve an attractive green lawn. Without professional weed control services, weeds will quickly take over your property and make maintaining it difficult - especially if you don't have the time or funds to invest in one.
To effectively eliminate weeds in your St Augustine grass, try using a solution of vinegar and salt as a weed spray. Not only will this eliminate them but also prevent them from sprouting again. All you need to do is create an effective 5-percent solution of household white vinegar with salt, along with some liquid dish soap.
Combine all ingredients in a spray bottle and apply to your lawn when conditions are sunny and dry. Doing so helps strengthen the vinegar, making it more effective against weeds.
White vinegar can also be used to eliminate weeds in your garden that are growing in areas with little sunlight. Covering them with mulch after treating them with a good dose of homemade herbicide will cut off their water and air supply, thus slowing their growth rate. Re emerged weeds can be treated again
Another option is to sprinkle some vinegar on each weed. The acid will effectively kill it from within, so be sure not to get it on grass or other plants nearby.
It's essential to note that vinegar can harm all plants and grasses, so it should only be applied as a spot treatment instead of on the entire lawn. Furthermore, it may be necessary to reapply vinegar every couple of weeks or so in order to prevent weeds from returning.
Mulching materials are an effective way to control weed growth in st augustine grass lawns. Not only does this keep soil temperature under control, but it helps prevent frost heaving during wintertime as well. Mulches can be composed of many items; the two most popular are wood chips and grass clippings.
What type of mulch you select for your yard depends on your individual requirements. Organic or inorganic mulches are both acceptable options; no matter which one you select, make sure it won't do any harm to the environment or compromise your health in any way.
Organic mulches are an excellent way to improve the health of your soil and inhibit weed growth. Furthermore, they boost nutrient levels in the garden and prevent erosion.
These can be created from a range of materials, such as straw, leaves, compost and hay. Additionally, you can recycle materials like cardboard or even shipping boxes for an eco-friendly touch.
Mulches are an affordable way to give your yard a beautiful aesthetic without breaking the bank. Additionally, they have many beneficial effects for the soil; they help replenish nutrients that may have been depleted due to chemical fertilizers.
St Augustine grass mulches can help prevent weed growth and add nutrients and vibrant color to your gardens or flowerbeds. Whether you want to mulch all of your lawn or just a section, this low-maintenance method makes it simple to get started. You can even recycle the freshly moved lawn, and use the grass blades as a cover to prevent weed emergence.
Depending on the soil type, you may need to fertilize your St Augustine grass in order to keep it healthy. If your lawn is dry and thirsty, add some water in order to prevent weed growth. Alternatively, spray with an effective weed killer such as Eco Living Solutions Weed & Grass Killer.
Mulch can protect your st augustine grass against harsh weather conditions like frost, hail and snowfall. Furthermore, it helps prevent fungus and mildew from forming - which can be a major issue for this grass type.
Mulches come in two varieties: organic or inorganic. Inorganic mulches are made from synthetic materials, while organic mulches come from nature itself.
Dish soap can effectively eliminate many lawn pests, such as grubs and ants, by breaking down their waxy cuticle. However, you should only use dish soap as a pesticide after diluting it with water and applying it directly onto affected areas.
Some dish soaps also contain phosphates, which can help break down oil and grease but which are potentially hazardous to the environment. When these chemicals reach lakes or streams, they encourage algae blooms that reduce water oxygen levels.
Today, many dish soaps contain non-phosphate ingredients which make them safe to use on plants and grass; however, always test any new product on grass form a small patch first to make sure it won't damage your lawn.
Dish soap can be an effective weed killer when mixed with vegetable oil and water in a spray bottle. Once applied to affected areas of your lawn, be sure to hose off any remaining dish soap or vegetable oil within an hour to avoid damaging grass or plants.
Dish soap also has the added advantage of killing moss, which is often an issue in gardens and can easily be removed without destroying grass.
Moss can be easily killed with a mixture of dish soap, water and vinegar. The dish soap will dissolve the moss while the vinegar helps to destroy it by penetrating its cells and breaking down its structure.
This homemade weed killer works best on sunny days when the sun can heat the mixture sufficiently to do its magic. Apply it early in the morning so that it has time to warm up as the sun shines down throughout the day.
When it comes to controlling weeds in your flower beds, you have several options. One option is using an organic weed killer that does not contain hazardous chemicals like glyphosate.
The second option is to make a natural weed killer with white vinegar and salt, which can easily be made at home using common household items. This simple yet effective solution requires minimal ingredients for success. The only downside is that vinegar is non-selective, meaning that it will kill grass and other perennial plants.
Organic weed killers are an efficient and healthy solution to getting rid of unwanted weeds and grassy weeds in your flower beds. However, there are a few things to take into account before using these sprays on your lawn or garden.
Organic weed killers work by attacking the foliage of the weeds and grass. A herbicide will destroy the leaf cuticle, making them turn brown and unusable for new growth. Glyphosate is one common herbicide; however, it's toxic to wildlife such as frogs and other aquatic life and highly soluble in water - leading to contamination of groundwater, soil, and air.
Another option is using a pre emergents weed killer. These products prevent seeds from germinating by coating them with an aqueous solution of an active ingredient, usually plant-derived such as corn gluten meal or a mixture of fungicide and herbicide.
This weed killer can be applied to mulched flower beds (containing wood chips), around patios and swimming pools - or anywhere else that weeds tend to sprout the most. It also works well on lawns to prevent them from reseeding.
You can purchase a ready-to-use spray that contains vinegar and salt. This product is more potent than household weed killer and should be applied using either a trigger sprayer or a pump-type garden sprayer.
You can make your own organic weed killer at home using a basic recipe: 1/4 cup of salt, a quart of vinegar (containing acetic acid), and two teaspoons of dish soap. You can add other ingredients for increased effectiveness like pickling vinegar diluted with essential oils or essential oils.
Depending on your climate, you may need more than one application of this weed killer to completely eliminate all weeds in your flower bed. This is especially true if the flowers are clustered or densely planted as they will spread rapidly. Ideally, spray the herbicide during warm days without rain forecasted. Uniform application is also very important, as this will allow the active ingredient to spread quickly.
While selective herbicides are great for targeting specific broadleaf weeds, perennial grasses, annual grasses, and invasive weeds - they often contain harmful chemicals that target the root system of plants and should be only used as a last resort.
Non-selective herbicides kill weeds on contact, but may also harm ornamental plants, garden plants, and other plants - so caution should be exercised when spraying these around your flower gardens. Depending on the degree of weed infestation, a simple sprayer shield can be used to limit the contact of herbicide with surrounding plants.
If you have a large lawn or flower bed that requires weed control, organic grass killer is an option worth considering. Unlike many commercial weed-killers, these products are glyphosate-free and safe to use around people, pets, and wildlife alike.
No matter the weed type you have, there are various organic grass killers to choose from. Concentrates, granular solutions and sprays can all be used; some require diluting before use while others come pre-diluted and ready for application.
Eco Living Solutions Organic Weed Killer concentrates are the most convenient to use, as they can be diluted in water to the desired concentration before spraying on weeds, saving you time. When selecting the concentration for your solution, take into account both the size of the flower bed affected by weeds and their sensitivity to chemical treatments.
Another viable liquid concentrate for lawn and garden use is Safer Brand Fast Acting Weed and Grass Killer. This solution works by dehydrating weeds and damaging their cuticle, ultimately leading to the death of leaves and dead grass. Furthermore, it's non-corrosive - making it ideal for home gardens.
Make your own weed-killing solution using vinegar, salt, and essential oil. These all-natural ingredients work together to eliminate unwanted other plants without harming either the environment or your family members.
One major downside of essential oil-based weed killers is that they are poorly soluble in water, and will not dissolve. To overcome this, a dish soap solution may be prepared, to allow the essential oil to better dissolve and disperse in the water.
Opting for organic grass killer is a wise decision for your family, the environment and wallet. With so many options available, it can be daunting to decide which product is ideal for you. Luckily, we've compiled this list of the best organic weed killers to make it easier to find the ideal solution for your lawn and flower beds. With these products in place, you can guarantee a weed-free garden for years to come!
When flower beds become overrun with unwanted weeds, it can quickly detract from the beauty of the flowers and soil. Fortunately, there are plenty of natural weed killers that are effective at wiping out weeds without harming other plants or soil. Furthermore, these products are eco-friendly and non-toxic to pets, children, and the environment.
When it comes to flower beds, there are various weed killers you can use, such as powders, granules and sprays. Which type of weed killer you select depends on several factors like how many weeds there are, their growth pattern and what objectives you have in mind.
Powdered weed killers can be applied with a spreader or shaken from a bottle for larger areas. These are your best bet if you need to treat an extensive area in your garden. Powdered weed killers may also be used on flowerbeds; however, be aware that they may harm nearby flowers as well.
Another option is to make your own natural weed killer using ingredients found at any grocery store. For instance, using boiling water to kill the roots is a great way to kill weeds.; however, it may take some time before a full kill occurs.
A more traditional, and oftentimes overlooked method for weed control, is to simply pull the weeds from your flower bed. As long as the weeds are pulled with the roots, this is a great method to stop weeds, without harming your ornamental plant. This ensures that you apply as few chemical products as possible to your soil. Applying mulch overtop of the freshly weeded area will slow down the regrowth of seeds, making this an effective method for weed control.
Making this homemade weed killer requires stirring together salt and vinegar thoroughly before applying it to your flower bed. The salt helps the vinegar cling to the weeds, making it harder for them to wash away. This method works particularly well for dandelions and other broad-leaf weeds that are difficult to eliminate using other weed killers.
If you need a more precise solution, post-emergent weed killer may be your answer. These products are intended to eliminate existing weeds and can be applied during any season: spring, summer, or fall. Because these products tend to be strong and eliminate all types of weeds quickly, be sure to monitor your flower beds closely for any emerging weeds that do arise.
If your flower bed is overrun with grass and other weeds, it can be challenging to keep them at bay. The most effective way to do this is by avoiding toxic chemicals; instead, opt for a natural weed killer that's safe both for people and pets as well as the environment.
One solution is to use a pre-emergent spray that eliminates seeds in the soil before they sprout. This type of weed preventer works best for flower beds, patios, driveways and other areas where weeds may thrive.
Another option is a selective herbicide that kills only specific types of weeds. These products come as liquid concentrate or spray bottles and tend to be effective at wiping out grass around ornamental plants and shrubs in the garden.
You may also use a diluted vinegar solution to directly spray away weeds. This is an effective alternative to chemical herbicides, though it may require multiple applications.
A propane torch tool is another effective option to eliminate weeds without harming nearby plants or the environment. This method typically also destroys the roots of grass as well.
You could also pour boiling water over the weeds and grass to eliminate them, but be sure to handle the water with extreme caution as you could burn yourself if not done correctly.
Though less effective than chemical herbicides, these methods are safe and eco-friendly alternatives for keeping your flower bed weed-free. Plus, they reduce the exposure of your family members to harsh chemicals while saving you money in the long run.
If you have the time, pulling weeds by hand is the best option. This method works best for small patches of weeds that haven't grown too large and have weak root systems. To do this, wear work or gardening gloves and long pants.
If you don't have the time to weed your flower bed, hiring a professional lawn care company might be worth considering. They know where to look for weeds and the most efficient ways to eliminate them from your property. Plus, they'll do the job faster since they know exactly what needs to be done!
The best weed killer will depend on your particular requirements. The grass-specific herbicide will demand a different kind of approach compared to conventional hand pulling of weeds. There are many effective methods for weed management around your flowers beds, with the end goal to have a weed free flower bed.
As we mentioned before Eco Garden Solutions manufactures a number of natural options (both concentrated and ready-to-use) to control and manage weeds around your house and garden. With a proven track record, you can rest assured that your flower beds, lawn, or backyard will be ready for summer, no matter which method you choose to employ.
Should you choose to try any of our products, we offer an unconditional money-back guarantee, as well as free shipping across the continental United States. With quick 2 days turn around times, our products will be delivered directly to your door, just in time for the summer.
]]>The right weed killer sprayer can help you kill weeds quickly and effectively. But before you get started, there are a few things to keep in mind.
First, decide what kind of weeds you want to eliminate. Some herbicides are selective and only kill weeds, while others are non-selective and kill all plants in the area.
When you're dealing with a large yard full of stubborn weeds, it's a good idea to invest in a weed killer sprayer. These weed killer sprayers apply herbicides and pesticides with precision, ensuring a thorough treatment that kills weeds before they can spread to your lawn or garden.
Gas-powered weed killer sprayers feature strong jet streams that can cover a lot of ground quickly. However, they are less eco-friendly than battery-powered or hand pump models.
Battery-powered weed killer sprayers are lighter and less expensive than gas-powered tools. They also eliminate the need for fuel refills and dragging cords around.
They’re also easier on the environment. They use lithium-ion batteries for their battery powered pump that don’t emit gas or vapor.
Some of the best models are battery-powered backpack sprayers with translucent tanks so you can see how much liquid is in them. Some have a variety of nozzle attachments and spray wands, which is helpful for different jobs.
Hose-end sprayers are the perfect tool for applying fertilizers, pesticides, and weed killers to lawns and gardens. They are easy to use and can cover thousands of square feet with a single application. They are often used as garden sprayer for weed control purpose and are used to spray ready to use weed killers.
Some hose-end sprayers siphon out the liquid product and mix it with water automatically, while others allow you to adjust the flow rate so you can spray at exactly the right amount for your landscape.
The size of the hole underneath the nozzle determines how much product is siphoned out for every gallon of water that you spray. Several adjustable hose-end sprayers have a dial on top that allows you to choose from a variety of hole sizes ranging from as little as 1 teaspoon per gallon to 8 oz per gallon.
Backpack sprayers are used to apply pesticides and herbicides in a more precise, controlled manner over a larger surface area. This makes them ideal for use in areas that a handheld pump sprayer cannot easily cover. They are more suitable for larger jobs rather than indoor use, for example landscaping large areas.
Backpack sprayer units are available in different sizes and often include a variety of spray attachments, such as spray wands and shoulder strap. They are also often designed with padded backing and straps that make it easier to carry large amounts of liquid around.
Before using a backpack sprayer, you should calibrate it for the right spray pressure. This ensures a consistent application rate and a uniform spray pattern.
Chemical sprayers are used for controlling a variety of plant insects, diseases, and weeds. They use a pressurized tank to pressurize a sprayer nozzle and release the pesticide into the air.
Agricultural pesticides are powerful, corrosive chemicals that can cause significant damage to tanks, hoses, and sprayer nozzles. Regular maintenance and proper cleaning of equipment will reduce this corrosion.
Herbicides are sprayed to control property weeds and to regulate aquatic algae in lakes, rivers, and ponds. They are also sprayed on lawns and golf courses to kill unwanted grasses and other plants.
Tank sprayers are an effective way to apply herbicides and other lawn treatments, as well as pest control chemicals. These sprayers come in many shapes and sizes, depending on your specific needs.
They are available in battery-powered or manual piston models, and they have different nozzles for different purposes. Choose the right nozzle for your task and don't over-pressurize to avoid damaging the tank seals.
They also help you maintain the uniformity of your chemical mixture. Some dry chemicals float on the top of the tank or settle to the bottom, and can't be mixed properly without slurrying them in a separate container before adding them to the sprayer.
]]>If you've ever wondered what temperature ice melts the fastest, or at what temperature does ice melt, you've come to the right place. Ice melts faster at milder temperatures than at colder ones. This is because exothermic deicers work faster when the temperature is warm. There are a few different types of salts that work to melt ice, and each works differently.
There are two types of deicers - endothermic and exothermic. Endothermic deicers use heat to melt ice and work better in colder temperature, while exothermic deicers work better in milder temperatures. Exothermic deicers work better in milder temperatures because they draw heat from the surroundings.
Both calcium chloride and magnesium chloride work by absorbing moisture from the air surrounding them and initiating an exothermic reaction, producing up to 120o F. Eco Garden Snow and Ice Melt Pellets uses calcium chloride. Since magnesium chloride is less effective than calcium chloride, magnesium chloride is not used in our product, but it works by reacting with water to produce temperatures of 75 - 90o F.
One question people may ask is what temperature does calcium chloride melt ice at? This chemical, which is a popular choice for melting ice, works best when the temperature is below freezing. It works best at minus 20 degrees Fahrenheit.
When compared to other ice melts, calcium chloride is the fastest-acting. It generates significant heat energy while dissolving. This heat energy is what helps ice melt faster even in colder temperatures. While it may be more expensive than rock salt, it can effectively melt ice when temperature drops to minus 25 degrees F. Its anti-freezing properties can help prevent falls and other injuries.
You may be wondering, "What temperature does rock salt melt ice?" If you've ever wondered, you're not alone. In fact, the answer isn't always what you think. It depends on the amount of snow and ice that's covered. In thicker patches, rock salt may not be as effective. It may also cause damage to concrete surfaces if you apply too much. To avoid this problem, you may want to use a different method for clearing your driveway.
Rock salt (aka. sodium chloride or table salt) has a melting point of between 15 and 25 degrees F, although its effectiveness is affected by other factors. For example, the ground temperature, wind, and accumulation all play a part in the effectiveness of the product. The salty water continues to interact with the ice, lowering its freezing point and melting it. The temperature would have to drop below the freezing point of pure water (32°F, 0°C) in order to freeze the salty water.
The temperature at which water starts to melt is called the melting point. At temperatures above 32°F (0°C), pure water ice melts and changes state from a solid to a liquid (water); 32°F (0°C) is the melting point. When you heat ice, its temperature rises, but as soon as the ice starts to melt, the temperature stays constant until all the ice has melted. This happens because all the heat energy goes into breaking the bonds of the ice's crystal lattice structure. At this point, the molecules in the water start to vibrate more than their normal crystalline state. The water molecules are no longer attracted to each other and begin to slide past each other. The energy transferred to the molecules helps to change their state from liquid to solid.
The melting point of water is 0 degrees Celsius. It takes a large amount of energy to change from a solid state to liquid. For this reason, ice can only stay solid for a limited amount of time. But as the temperature rises above 0 degC, it begins to melt. The energy required to change the state of water from solid to liquid is very large - about 334 joules per gram of water. This energy is then released into the air and the ground.
Surface tension is a physical property of a solid that can affect a material's ability to melt. It is caused by the way water molecules are ordered on its surface, which maximizes hydrogen bonds and allows water molecules to diffuse across the surface. The higher the surface tension, the less dense the ice becomes.
As the temperature of the ice increases, the atoms begin to vibrate, and the ice is no longer able to form an orderly crystal structure. The molecules of water move past one another, causing the ice to melt. The water molecules absorb energy from the surface, and this energy overcomes the attraction between the ice molecules.
The surface temperature of ice melt is affected by meteorological conditions. The ablation rate of ice melt is dependent on the temperature and density of ice and debris. In this paper we estimate the ablation rate for two types of environments, Larsbreen and Ghiacciaio del Belvedere. The Larsbreen area consists of mostly open ice, while the Ghiacciaio del Belvedere site has more saturated ice.
Ice melts when the thermal driving force becomes greater than the energy of chemical bonding. In this case, ice crystals at the surface form less stable bonds with neighboring atoms and are thus susceptible to disordering forces of heat. These conditions cause the surface to melt at temperatures below the bulk melting temperature. Therefore, many materials have premelting layers on their surfaces.
]]>When you use ice melt, whether it is to prevent ice or to remove snow - only apply as much as is needed to fully cover the surface. Overapplication will not melt the ice faster, and may actually be harmful to surfaces and the environment.
Avoid applying too much liquid or granular ice melt as this could damage the pavement. It is also important to apply liquid ice melt according to the manufacturer's instructions.
When using ice melt, the temperature must be taken into consideration. Some de-icers work best at very low temperatures. Calcium chloride and magnesium chloride are the best ice melts for very cold temperatures. However, they should never be used on metal surfaces such as concrete.
The characteristic features of melting ice are shown in Figure 8. When the ambient temperature is low, the ice surface develops longitudinal grooves with regular amplitude. Similarly, the ice surface is smooth at higher temperatures. The dashed-dotted line in Figure 10 indicates the melting rate. The melting rate increases with increasing ambient temperature and is nearly independent of inclination angle.
Liquid ice melt is an alternative to rock salt and is an effective way to melt ice at lower temperatures. It works by lowering the ice's temperature, which causes it to gradually transform into water. This process prevents the ice from sticking to concrete and other materials, and helps to mitigate its damaging effects. It is best applied several hours before snow falls. It is also cheaper than rock salt.
There are 6 main types of ice melt on the market. Their melting points may differ, depending on the manufacturer. One type is sodium acetate, which does not contain salt and is approved by the FAA for commercial airport runways. The cost of sodium acetate is slightly higher than other types of ice melt.
The chemical makeup of an ice melt plays a key role in its residual action. Products with a longer residual action are usually more expensive, but they will reduce the need for frequent application of ice melt. Some products contain more than one ingredient to ensure longer-lasting effects, which can reduce costs and save money.
Liquid ice melt works at lower temperatures by lowering the freezing point of water. This method is environmentally friendly and does not produce waste as much as solid rock salt does. However, it is important to note that liquid ice melt must be applied several hours before a snowstorm.
Although liquid ice melt does work at colder temperatures, it still works best when applied before ice accumulates on the surface. It is recommended that you spread a thin layer of the product before snowfall occurs. It should be mixed with water and the melting process will begin.
Pet-safe ice melt contains no sodium or chloride and breaks down into nitrogen-rich fertilizer when it hits the soil. Still, too much can harm plants and lawns. Too much ice melt can burn, blister, or even kill a plant. One story from a poison control center describes a man who had been kneeling on an ice-melt-covered road when he accidentally stepped on it.
Magnesium chloride is another plant-safe ice melt that works well in low temperatures. It is also slow-acting and leaves less residue than other types of ice melt. The ice-melting solution is less toxic to plants than calcium chloride and works better between zero and thirty degrees Fahrenheit.
Alternative products like rock salt can also damage plants. Although they do not cause as much damage as road salt, they contain chloride salts, which are corrosive and toxic. Salts from road salts slough off into soil and kill most plants that grow near roads. Additionally, the dissolved salts can damage plants if ingested.
Liquid ice melt is safer for your plants than rock salt. It contains deicing compounds that break down the ice more slowly. Sodium chloride is common early-spring fertilizer, but it may also harm plants and foliage. As a result, it is best to use a blend of rock salt and liquid ice melt.
The best time to apply Liquid Ice Melt is before the first snow or ice falls. Apply a thin coat about twenty-four hours before snow and loose ice begin to form. Thicker ice formations may require multiple applications.
Rock salt is one of the most common deicing ingredients, and it's also the least expensive ice melt available. It costs about $10 to $15 per 50-pound bag, but some companies sell smaller bags for less than that. Both products work well in temperatures from 5 to 15 degrees Fahrenheit, making them a good option if you're looking to save money while deicing your home.
There are many advantages and disadvantages to each type of ice melt, including the price. The cheapest option is rock salt, which is readily available worldwide and can be extracted at very low prices. However, this ice-melting product is not environmentally friendly, is not effective in extreme cold temperatures, and leaves a white powder residue. It is recommended that you shovel off any snow that might be covering your driveway or sidewalk before applying rock salt.
If you plan on using ice melt on your driveway or walkway, it's a good idea to have a larger supply on hand. However, it's important to remember that the cheapest solution isn't always the best. This is because ice melts can damage asphalt, concrete, and even your car. To get the best results, you should apply the ice-melting solution before the ice starts to accumulate.
Rock salt is the least expensive ice melt, but it can cause a lot of damage if not used correctly. For instance, it can damage your lawn and plants. Potassium chloride, on the other hand, is very effective at low temperatures but may harm your plants if over-applied.
Knowing when to apply ice melt is important when dealing with winter storms. There are several factors to consider, such as how much to use and how to use it safely. It is best to read product instructions carefully to determine the right amount. It is best to wear protective gloves when handling calcium or magnesium chloride products. In addition, it is best to avoid applying these materials on roofs or parking lots, as the rock salt can enter the water system.
Putting down ice melt before freezing rain is a great way to limit the amount of snow and ice that accumulates. This will protect cars, sidewalks, driveways, and roofs. You should also be sure to remove any slush layer, as it will reduce the risk of damage to concrete and other surfaces from water absorption and thaw/refreeze cycles.
When you put down ice melt, you should apply it at the right temperature. Putting it down in cold weather (minus 25 degrees Fahrenheit) will help the melt work faster. However, you should avoid putting it down during temperatures that are too low, as it will simply wash away.
Another way to make sure that you've prepared for freezing rain is to put down sand. Sand reduces the corrosive properties of ice melt and helps prevent slip and fall accidents. Sand also prevents the ice melt from making contact with underlying surfaces. Sand also prevents the ice melt from damaging plants and landscaping.
When putting down ice melt, read the label carefully. This will help you know how much to put down and where to apply it. Some ice melt products contain chemicals that are harmful to plants and pets. Using too much of these compounds can also be hazardous to waterways.
Before applying ice melt, make sure you read and follow all directions on the package. Some of these products are toxic to small children and pets and can cause chemical burns. You should also follow the package directions to avoid contaminating your property with too much ice melt. In addition to damaging your property, ice melt can damage indoor and outdoor surfaces. You should also keep it out of reach of children and pets.
After putting down ice melt, you should make sure to clean the tracks regularly. Ice melt can leave residue that may damage carpets and floors. Using a scraper/wiper mat can help minimize the buildup. You should also change the mats daily, because a saturated one can lead to the buildup of snow and ice. Make sure to place extra walk-off mats outside and inside your building.
Putting down ice melt during a snowstorm is a no-brainer, but putting it down during freezing rain is a bit more complex. Freezing rain can dilute the ice melt, and it can wash off exposed surfaces. Unless you're 100 percent sure that the rain will be a problem, you can risk losing your ice melt.
If you're putting down ice melt for your driveway or walkways, be sure to spread it evenly. If the ice melt is applied too thick, the material may be too slippery. The easiest way to spread it evenly is to spread it thinly in layers. Then, spread the remaining melt on top, making sure to cover any sloped areas with a thin layer of ice-melt.
Ice melt comes in a variety of different varieties, so make sure to read the product label for instructions on how to apply it. Often, the package will state how much product is recommended for a specific area. For example, a bag may specify four pounds per 200 square feet. Some manufacturers recommend using hand-held spreaders for smaller areas, while walk-behind spreaders work better for larger areas. Regardless of which type you choose, it is important to apply ice melt to the areas where it will be most effective.
Ice melt also works better at lower temperatures. Calcium chloride begins to work faster when temperatures drop below 25 degrees Fahrenheit. While calcium chloride is safe for use around water sources and pets, it still has corrosive effects on underlying surfaces. Be sure to read the label before you put down any ice melt during a storm.
It is also important to use care when disposing of ice melt products. Excess salt is harmful to the environment and can wash into nearby creeks and rivers. Donate ice melt products and other used salt to help local water bodies. But be sure to read the label carefully, as some products contain ingredients that are harmful to the environment.
While both rock salt and urea are effective ice melts, they are both not environmentally friendly and can damage plants and fauna. Moreover, both are less effective when temperatures drop below 21 degrees Fahrenheit. Fortunately, there are alternatives that are both environmentally friendly and inexpensive.
One alternative is alfalfa meal, a 100% natural ice melt. Though it contains nitrogen, this is in much lower concentrations and therefore less harmful to local water systems. Furthermore, the grainy, dry texture of alfalfa meal is an excellent choice for melting ice because it creates additional traction. It is available at most gardening and hardware stores.
Another alternative to salt is urea, which is relatively inexpensive and not harmful to plants. This nitrogen fertilizer is less damaging to vegetation than other salts and is more effective at low temperatures. However, the downside of urea is its ability to damage vegetation if overused. This makes urea an inferior ice melt, but it is more effective than salt when applied correctly.
Urea is one of the most common chemicals used in ice melt products. Unlike rock salt, it is not toxic for plants or wildlife and can be applied at night. It can also be used to melt existing ice, as it is effective at temperatures of ten degrees and below. Besides, it is safe for people to handle and use. Major airports have been using urea as an ice melt for years.
Despite its low price, urea is not the only alternative to rock salt. You can also use brown rock salt or white de-icing salt. While both have their own pros and cons, brown rock salt is a budget-friendly alternative. However, it leaves a brown residue and clogs carpets.
When choosing an ice melt, you should keep in mind all the aspects of its usage. Some ice melts are safer for concrete surfaces than others, and you must always check the label before applying it.
Using calcium chloride as an ice-melt agent is an excellent way to keep the pavement clear in freezing weather. Its chemical formula is CaCl2. When calcium chloride is in contact with moisture, it forms a brine solution that melts ice faster than most de-icing products. This compound also has hygroscopic properties that allow it to draw moisture from the air and quickly melt it.
Calcium chloride is an exothermic compound, meaning it produces heat when it comes in contact with moisture. It attracts moisture and creates a chemical reaction that creates a brine, which is water mixed with salt. This process occurs rapidly and generates a significant amount of heat.
Calcium chloride is also environmentally friendly, making it the ideal choice for outdoor applications. It can also be used as a fertilizer for plants. However, it is important to use caution when using calcium chloride as an ice melt. It can cause skin irritation and should be used cautiously.
There are several different kinds of ice melts available. Some are more environmentally friendly than others and emit less chlorine, which means they will cause less damage to the environment. Calcium chloride is considered the best of all ice melts. It is available in flakes and is sometimes sprayed with a blue color indicator. It's important to use the right one for the conditions in your area. Calcium chloride may cause skin irritation when handled with bare hands. It may also cause rusting on cars, trees, and concrete.
Calcium chloride has the fastest melting action of any deicing agent. Once it combines with water, it forms a brine that lowers the freezing point of water and melts ice rapidly. It also attracts moisture from the surrounding environment and attracts it to its surface, which helps it melt ice more quickly.
]]>If you're wondering whether or not applying ice melt on concrete driveway is dangerous, here are some facts to keep in mind. Rock salt and ice melt can cause concrete to crack, flake, and splinter when they go through freeze thaw cycle. This can seriously compromise the integrity of the concrete. The best way to prevent this from happening is to only apply the concrete safe ice melt products.
sPotassium chloride is one of the most common ice melt products on concrete. It is an environmentally friendly and plant-safe alternative to sodium chloride (rock salt), which can harm plants and turf. It works well in temperatures as low as 18°F. It is also less expensive than its counterparts.
Potassium chloride is the same chemical compound that is used in food salt. However, its particle size is larger. Because of this, many people assume that it is safe to use it on icy surfaces. Potassium chloride, however, has many risks, including potential exposure to skin and eye irritation.
Potassium chloride is a chemical compound that can be used in place of rock salt on concrete driveway and other surfaces. Its freezing point is lower than that of rock salt, but it melts ice as low as -6 degree Fahrenheit. It can be applied in a liquid or flake form, but the main advantage of potassium chloride over magnesium chloride is its low environmental impact. Potassium chloride is not harmful to plants and is biodegradable. In addition, it can be applied to most surfaces, making it an environmentally friendly alternative to traditional rock salt.
Calcium chloride ice melt for concrete is a safe and effective way to protect porous household surfaces from the damaging effects of ice and snow. It is a safe and environmentally friendly alternative to the conventional rock salt and other ice melts or snow melts that can damage concrete driveways. The calcium chloride in the melt leaves behind a clear brine that cuts through the snow, creating a Teflon-like surface that prevents the snow from sticking to the concrete.
It is an eco-friendly, non-toxic, and pet safe ice and snow melt. It is also safe for humans, animals, and plants. It also has no negative environmental effects and can be used in small quantities. Calcium chloride is environmentally friendly, so it is a good option for many different applications.
The best part about calcium chloride ice melt is that it is safe to use even in sub-zero temperatures, making it the ideal ingredient for the best ice melt. This is because it is 96% pure calcium chloride, which creates an exothermic reaction to melt even the thickest layers of ice. What's more, it is completely safe for concrete surfaces.
The problem with using magnesium chloride as ice melt for concrete is that it can damage the concrete. Although it's a powerful ice melte, magnesium chloride damages the concrete surface by increasing the amount of water that seeps into the concrete pores. This, in turn, causes damage to the concrete through freeze-induced expansion. This makes it important to use magnesium chloride with extreme caution and only apply a small amount to the surface. Not only does it work to prevent the formation of ice, but it can also help to remove existing ice.
Magnesium chloride is less corrosive than rock salt (sodium chloride). It's also less damaging to pavement and walkways, and it leaves very little residue. It's also less environmentally friendly than calcium chloride, which can damage the concrete.
When you need a pet safe ice melt that is also safe for your concrete walkways, driveways, and patios, you need Eco Garden Ice and Snow Melt. This product is odorless and colorless, and it continues to melt snow and ice at a temperature of -25 degrees Fahrenheit, making your snow removal extremely easy. It is one of our best ice melt products that are safe for concrete. Plus, it doesn't leave visible residue or stain your concrete driveways.
It can be used for concrete surfaces and it won't harm your concrete driveway. It will quickly melt ice and snow particles. It will be effective ice and snow melt until temperatures dip below -25 degrees.
]]>Calcium chloride is an environmentally friendly alternative to rock salt that can be used to melt ice. It works even in temperatures as low as -25 degrees Fahrenheit. It is also pet friendly and works well in freezing weather. Compared to rock salt, calcium chloride is safe for humans and pets.
Calcium chloride is an exothermic substance that generates heat when combined with moisture. It attracts moisture from the air and causes a chemical reaction that results in a solution of water and salt called an "ice melting brine." This reaction takes place rapidly, releasing a large amount of heat. This process can be used in the melting of ice in cold climates.
Calcium chloride releases heat as it melts, and its this exothermic nature that increases its performance, making it more efficient than rock salt when used as an ice melter. In addition, it can perform at extremely cold temperatures. This property makes calcium chloride a superior deicing agent and significantly outperforms rock salt.
The properties of calcium chloride also determine the speed of its action. It can melt ice at temperatures as low as -51C. However, at -60F, its melting action becomes impractical. This is because the melting temperature of a chemical, called the eutectic point, differs from its practical melting temperature in the field. Although magnesium chloride has a lower eutectic point than calcium chloride, it retains substantial melting ability between -10 and -25F.
Calcium chloride is used in ice melting applications because it is relatively harmless to soil and plants. It is also more effective in colder temperatures than sodium chloride. The effectiveness is attributed primarily to its ability to melt and liquify at colder temperatures and prevent re-freezing once the brine is formed. These are both important factors to consider when picking an ice melt, specifically;
Traditional rock salt deicers depend on moisture and water to work. This means that unless the temperature is above freezing point, sodium chloride will not be an effective ice melt.
Second - calcium chlorides' unique properties of being able to absorb water/moisture from the air mean that it will work below the freezing point of water. This means that it can be used to eliminate snow and ice even in the harshest of winter conditions.
Finally - because calcium chloride has less chloride per pound than sodium chloride, potassium chloride, or even magnesium chloride; this means road surfacing, concrete, sidewalks, and other targeted area will be less impacted by the harmful effects of chloride corrosion.
Compared to rock salt, calcium chloride is cheaper and less corrosive. It is also slightly more environmentally friendly. However, it is best applied a few hours before snow falls. This helps prevent the snow from sticking to the surface and prevents it from rolling away.
We all know that ice melters can potentially damage or crack concrete among other surfaces when the cold weather goes through periods of thaw and refreeze. These weather cyclings can cause the dissolved liquid to seep into the cracks in the concrete, and fracture the pavement overnight when the water freezes again and expands.
One major advantage of calcium chloride, is that the ice melting brine has a much lower re-freezing temperature when compared to conventional ice melters. This means that calcium chloride is less likely to re-freeze at night, preventing any damage to the surface you apply it to.
Calcium chloride is commercially available in three different forms: solid and liquid. Granules and flakes contain 77 to 80 percent calcium chloride, while liquid calcium chloride is available in solutions that contain between 30% and 42% calcium chloride per liter. Calcium chloride salt should always be stored in a cool and most importantly - dry space, as it attracts moisture.
Calcium chloride is also used in beverages and foods as a firming agent. It is widely used in sports drinks and bottled water. It is also used to keep canned vegetables firm, and it also helps retain the color of cheese. It is also used as an electrolyte in beverages and pickles. It has a pronounced salty taste and is an important ingredient in these products.
Calcium chloride is an excellent deicer for use in cold climates. Its exothermic action causes a liquid brine that dissolves ice. This liquid melts the ice, and it is easy to clean up. In addition, it is safe for pets.
Calcium chloride is a specialty salt that is used for several different applications. It is an effective deicing agent that not only improves the safety of roads and pedestrians, but it also eliminates unhealthy dust particles in the air. Calcium chloride is the most commonly used deicer, accounting for the majority of the volume used annually. Its chemical reaction with water produces a mild exothermic reaction, which causes it to release heat as it dissolves.
One of the benefits of calcium chloride ice melt is that it works at lower temperatures than other deicing agents. While rock salt and potassium chloride lose effectiveness at temperatures below zero, calcium chloride is an effective ice melter even at -20degF.
However, calcium chloride has some disadvantages over sodium chloride. Foremost, when the brine mixture is formed during the ice melting process, the pH of the solution is increased. This may cause damage to vegetation and plant life, as highly alkaline conditions are not desirable.
Second, the price point of calcium chloride de icers is often times higher than conventional salts.
Although calcium chloride is the most widely used deicer, it is expensive compared to other deicing agents. It can melt ice at a temperature as low as -25oF and is available in flake, liquid, and pellet form. Calcium chloride is hard on surfaces and can cause salt stains.
Pound for pound, calcium chloride makes for a much more effective deicer than any other salt on the market. The typical round form of the prill, is fast acting, and no need to use large quantities of the products makes it more economical for most situations.
Calcium chloride is also safer for the environment than rock salt. It is less likely to affect the water supply and cause plant damage, unlike rock salt, which may damage grass and plants and pollute run-off waters during the spring melt. Calcium chloride is three times more expensive than rock salt, but you only need a third of the quantity.
Calcium chloride is highly soluble in water and is ideal to melt ice faster in winter storms. Magnesium chloride, which is also highly soluble in water, is not as effective. It is best mixed with other deicers to maximize its efficacy.
The Winter months can be a challenging time for anyone.
Calcium chloride has the advantage of being able to dissolve ice faster. It changes the melting point of water and makes it difficult for ice to bond with the ground. In addition to being cheaper, calcium chloride is also more effective at melting ice at lower temperatures. It melts ice at temperatures of 15 to 20 degrees Fahrenheit.
Calcium chloride is a hygroscopic substance, meaning it attracts water molecules from the air and surrounding surface. Its ability to draw heat from the surrounding environment makes it a great choice for melting ice, especially in harsh winter conditions.
Don't hesitate to contact us at Eco Living Solutions should you have any questions, or inquiries about where to access our fast-acting calcium chloride ice melt, or need more information about our other deicers and de-icing products.
]]>When putting down ice melt, you need to be sure that it will work well. Although snow is an obvious reason to use ice melt, freezing rain can make it less effective. This is because the melt will become diluted by the rain and wash off exposed surfaces. This can leave you with a wasteful amount of ice melt.
The time it takes for ice melt to start working will depend on several factors, including the mass of the ice, the temperature of the surrounding environment, and the size of the crystals on the ice. Under the right conditions, melting can happen almost immediately. The crystals on the ice will begin to absorb water and start breaking down the ionic solution.
When using ice melt, it is essential to not use too much. Excessive amounts of the product can track into the building, contaminate the water supply, and damage vegetation. Also, excessively applied products will not work as fast. Make sure to read reviews before buying ice melt.
When applying chemical ice melt, you should wear eye protection. Calcium and magnesium chlorides are hygroscopic, meaning they pull moisture from your skin.
One common question for home owners is, "How long does rock salt take for ice to melt?" The answer depends on the temperature. Rock salt works in temperatures as low as -6 degrees Fahrenheit and calcium chloride works down to -25 degrees. Both types of salt melt ice in a similar amount of time, although calcium chloride is more effective and cheaper.
Rock salt is the most common ice melt, but it has limited effectiveness in extreme cold. Sodium chloride will not melt ice below 20 degrees. Rock salt will melt ice at lower temperatures, but it will damage plants and lawns. Calcium chloride, on the other hand, works by absorbing moisture from the air and quickly melting snow and ice. However, this type of ice melt is a more expensive option and tends to damage nearby vegetation.
Another ice melt product is magnesium chloride, which works better on concrete and won't harm plants, although it isn't as effective. Potassium chloride is another option, though it works slower than sodium chloride. Sodium chloride is corrosive and can damage vegetation and aquatic life. It can damage grasses and plants, and can be dangerous if used near water and plants.
The ice melting effect of rock salt is dependent on the temperature. As the temperature drops, the reaction between the salt and water slows down. This isn't an issue when salt is used on sidewalks, where time is less of a factor. However, highway deicing requires that salt work fast.
When using ice melt, you must read the directions carefully to ensure that you use the right amount. Use gloves to prevent chemical burns to your hands, and don't spread the product on roofs. If used incorrectly, rock salt can corrode metal and concrete. Therefore, it's best to only apply a thin layer of the product.
In addition to rock salt, other types of deicers are available. These include sodium chloride and calcium chloride. These are both effective at melting ice, but calcium chloride works better at the lowest temperature.
Calcium chloride ice melt is an environmentally friendly alternative to rock salt. It works well in temperatures as low as -25°F and is pet friendly. It can be purchased in bulk for a low cost, making it an ideal option for outdoor use. Calcium chloride is also a good choice if you have a dog or cat that needs to stay warm.
The exothermic nature of calcium chloride ice melting has been demonstrated in several experiments. The temperature at which calcium chloride dissolves in water is a key factor determining the rate of melting. CaCl2 solution temperature is about 23 degC. The temperature at which calcium chloride ice melts is near the melting point of the eutectic solid.
The chemical formula of calcium chloride is CaCl2. It is a crystalline white solid that is highly soluble in water. It is an exothermic substance because when calcium chloride is mixed with moisture, it produces heat. This makes calcium chloride a good alternative to sodium-based rock salt for deicing purposes. Besides deicing, calcium chloride has many other applications. Nevertheless, deicing accounts for the largest volume of calcium chloride produced annually.
Calcium Chloride Ice Melt is a great option for ice melt products for the winter months. It is effective at lowering the freezing point of water by up to ten degrees Fahrenheit. It is available in pellet, flake and combination blend forms. It is very inexpensive and is easy to use. However, it has a negative side: it can corrode metal and destroy tiles and carpets.
To avoid this, it's best to buy a product that contains 70% calcium chloride. These products are a great value as they can be used in temperatures as low as -25 degrees F. Another perk to buying a high-quality product is that it is recyclable. This prevents waste and is good for the environment.
Calcium chloride is an ice melter that's commonly used for deicing. It works by absorbing water from the air and forming a brine that melts ice more efficiently. It also removes harmful dust from the air. This chemical is less harmful to the environment than rock salt, which can leave behind an oily or powdery residue.
Calcium chloride ice melt is a great product that works well on icy roads and pavement. However, it is important to follow safety precautions, particularly when using it on pavement. This product may cause corrosion on concrete or grass, so be sure to wear gloves and protective eyewear when using it. It is best to use this product in small quantities and use only as directed on the packaging.
Calcium chloride ice melts work by attracting moisture from its surroundings and breaking it down, thereby melting ice. However, calcium chloride is toxic to pets and may also cause gastrointestinal issues. If you are using calcium chloride ice melt around livestock or other pets, it may be necessary to buy a pet-safe version.
Calcium chloride is a solid, inorganic compound with the chemical formula CaCl2. It can be used to melt snow and ice by releasing heat when it comes into contact with moisture. It is a popular alternative to rock salts for deicing applications. It quickly melts ice and is environmentally friendly.
Calcium chloride ice melt is most effective when applied on driveways, sidewalks, and steps. It works at lower temperatures than traditional rock salt and is ideal for these types of applications. It is available in the form of pellets, which penetrate the walkway surface quickly and separate ice and snow.
]]>Salt bags are a great way to keep your driveway and walk paths safe. They can melt ice quickly and provide extra traction. You can purchase them in various quantities ranging from a single bag to a full pallet. When used correctly, salt bags can help prevent slips and falls. And they're also economical.
When it comes to using rock salt, make sure to read the instructions carefully. It's possible to over-use rock salt, which can be harmful to plants, pets, and even parts of your home. It's best to know the type of salt you're using, and the quality. And, of course, make sure it's suitable for your location.
Another way to keep icy roads safe is to sprinkle sand on the roads. Although sand doesn't melt the ice, it helps provide traction. However, if you're not sure what kind to use, you should look into a salt-free solution instead. It's safer for the environment and is easier to distribute than rock salt.
Salt spreaders work great with most conventional rock salt products, provide great coverage, and are an absolute must if you need to spread over a bag of ice melt over a large area.
When it comes to snow and ice, a bag of salt is essential to prevent slipping and sliding. It can be purchased in bulk bags to cover larger areas and car parks. It can also be sprinkled on the ground for traction. This type of salt is categorized as deicing salt.
A Brown Rock Salt bag of salt for snow can be a versatile product. It can be used for car parks, paths, and roads. Its granules are 5mm in diameter and contain some moisture. When delivered, it appears a natural, earthy red color.
If you want to avoid the expense of transporting a large bag of rock salt, you can use smaller bags of salt. They're a lot cheaper and will keep you safe this winter. They also keep the area cleaner than other types of salt. When you're not using it, you can use a plastic bag to store it in.
Another great way to keep snow and ice at bay is by storing your salt in a climate-controlled location. This will prevent the bag from freezing and help it stay usable. Another important factor to consider is the environment impact of sodium chloride, so if you're able, look for a less damaging alternative.
There are several products that you can use to melt snow and ice without harming the environment. GreenMelt ice melt bags are a great option for many different surfaces, including driveways and sidewalks. They come in a variety of sizes and can be spread using a hand spreader. They contain calcium chloride and magnesium chloride, which are both good for ice melt. Most of these products are also resealable, making them easy to apply to driveways and sidewalks.
GreenMelt ice melt bags provide a commercially balanced blend with a green tint that allows for easy application. These ice melt bags provide a quick deicing boost as well as prolonged melting action. They are safe to use on grass and lawns, as well as on walkways and driveways, and are effective down to -5 degrees Fahrenheit.
When buying ice melt, it's best to buy in bulk. This way, you can save money, and you won't have to worry about having to store ice melt during the warm months. Buying in bulk is the best option if you plan on doing lots of winter activities.
Eco Living Solutions Ice Melt for Snow is a safe alternative to traditional rock salt for homes with pets. Developed with veterinarians, it contains no paw-irritating chlorides or salts. It melts ice in as low as 10 degrees Fahrenheit and can be used for driveways, sidewalks, and steps.
Eco Living Solutions Ice Melt is available in purple bottles and has an easy-grip handle. It is safe to use around pets, and is great for residential applications on concrete and other slippery surfaces. It also dissolves ice and prevents your pet from getting stranded.
]]>Alternatives to winter salt are becoming increasingly popular. These alternatives are environmentally friendly and are an economical way to maintain pavement. The problem with sand is that it is not easy to clean for reuse and is often disposed of after the season is over. In addition, it can clog run-off systems. These problems indicate the need for alternative salt. Some popular alternatives are beet juice, molasses, and brine from pickling and cheese-making.
Another option is to use kitty litter. The clay content of kitty litter helps to increase traction on slick surfaces. However, cat litter can remain in the environment after a storm. If you are considering using this alternative, be sure to research it first. It is possible to use it to clear your driveway, but you should be careful not to endanger wildlife.
Another common alternative to certain de icers is sand. The main drawback to using sand is that it has a negative effect on the environment. While sand provides traction, it does not act as a melting agent when battling the winter weather.
One of the main concerns when using rock salt as ice melt is the potential damage the sodium chloride can cause to concrete and soft surfaces. Rock salt is corrosive and can damage surfaces like carpets, rugs, and soft furnishings. It also damages concrete and asphalt. In addition, it is harmful for pets, as sharp pieces can lodge in their paws. Calcium chloride is a safer alternative that doesn't cause damage to lawns, but it costs three times as much as rock salt.
Another concern is the damage rock salt can do to the environment. It contains a high level of chloride, which can leach into groundwater. This can be harmful to plants, especially those that grow in soil. Also, it can corrode motor vehicles and other concrete surfaces, and it may harm both pets and wildlife.
Rock salt is an effective deicing agent, but its effect diminishes as temperatures drop. As a result, it is best used after snow has melted. This is because the rock salt creates a brine with a lower freezing point than ordinary water.
One recent study evaluated the cost effectiveness of ice melt. The researchers examined traffic accidents, property damage, and travel time improvements to determine the cost effectiveness of the two winter treatment options. The study found that salt brine treated roads reduced traffic accidents by 88 percent and the average cost of an accident decreased by 10 percent. Additionally, no fatalities were recorded.
Although winter salting may seem like an unnecessary expense, the costs of salt and deicers may not be as obvious as we think. The Minnesota Pollution Control Agency recently published an article discussing the cost of preparing roads for the winter. The article outlines the costs of winter maintenance equipment, salt, and staffing. It also discusses the environmental impact of salt.
In addition to being more expensive, salt has a negative impact on the environment and infrastructure. Many states and cities have changed their winter operating procedures because of this problem. For example, Dane County, Wisconsin, launched the "Be Salt Wise" campaign to limit the amount of salt that local governments distribute on public roads and encourage citizens to use alternate methods when possible. Other cities have tried salt alternatives such as calcium magnesium acetate, magnesium chloride, cheese brine, and beet juice. However, these methods have many limitations and are not cost effective.
While spreading salt across your driveway may seem like an easy way to deal with your winter blizzard, there are many consequences of overuse. Increasing amounts of road salt can damage plants, wetlands, and wildlife. In addition, salt can harm your car's brake linings and frame, and it can affect the quality of water.
One of the most significant consequences of winter road salt is the increased chloride levels in waterways. This chemical is not naturally filtered by the soil and can end up in our drinking water. A recent US Geological Survey study found that urban streams were experiencing a rise in chloride levels, and that 29 percent of urban streams exceeded federal safety levels.
Despite the negative effects of winter road salt, technology has improved in recent years. Weather monitoring and low chloride alternatives have given winter maintenance professionals more tools to control snow and ice with less salt.
Calcium chloride ice melt is an environmentally friendly alternative to rock salt and works down to -25°F. Calcium chloride is also pet friendly. It is also effective at preventing the formation of ice and snow in vehicles. The granular material is available in several different sizes and is easy to apply to ice or snow.
Calcium chloride is a soluble salt with a strong attraction to water and causes a chemical reaction. The reaction generates a significant amount of heat, making it an excellent ice melter. Because it generates heat, it works even in extremely cold temperatures. It's also faster than other ice melters.
Calcium chloride ice melt is an excellent choice when dealing with ice or snow. The product will dissolve the ice, preventing falls and auto accidents. This chemical will also dissolve particles trapped between toes and fur. Unlike rock salt, calcium chloride ice melt will not re-freeze.
Calcium chloride is an inorganic compound with a unique ability to melt ice at lower temperatures than other options. Once in contact with ice, it forms a brine solution which melts the ice much faster than other deicing compounds. It also has hygroscopic properties, which means that it can attract moisture from the air. It is available in flake or pellet form.
Sign in or create an account and shop our brands. You may also find the product and delivery information on the product page.
]]>While ice melt can be helpful in freezing weather, it also has some drawbacks. For instance, it is not very effective when used in larger amounts, some ice melt products do not work in all winter weather, and some can be harmful to metal or chipped concrete surfaces. Therefore, you should aim to only apply a few pounds of ice melt per 500 square feet. Applying more than this amount wastes your time and money. Instead, you can use calcium chloride ice melt which works down to -25degF and does not require frequent reapplications. It also has the added benefit of being safer for concrete and non-treated metal surfaces.
When it comes to removing ice and snow from driveways, salt is often the first choice for homeowners. However, it can damage pavement and plant life, and is harmful to pets and children. In addition, it can irritate the skin and mouth, and even be toxic when ingested. Fortunately, there are many alternatives to rock salt.
Sand is one of the most common ice melt alternatives. It helps provide traction on slippery roads and surfaces, and is inexpensive to purchase. Sand is a great option because it's not permanent, and it's easy to remove, too. Another common alternative is brick sand, which is coarser than typical sand. You can find brick sand at any building supply store. Ash is another convenient alternative, which helps melt ice quickly in sunny weather. The biggest drawback of using any kind of sand is that it doesn't actually melt the ice, and doesn't lower the freezing point of the water - all it does is provide traction for slippery surfaces.
Another effective alternative is to use fertilizer. It is cheaper and can lower the melting point of ice without damaging the surface. It works best in low temperatures, but is not as effective in extreme weather. The only downside is that it has a limited melting time. If you want to try it, make sure you mix it well.
Other alternatives to sodium chloride include calcium chloride, potassium chloride, and magnesium chloride. Potassium chloride is more effective at low temperatures, but is more expensive than rock salt. This chemical-based alternative is often not recommended for large icy areas. However, it is better than sodium chloride if you're concerned about environmental damage.
Potassium chloride, which is nontoxic, can be a useful alternative to rock salt. Potassium chloride is a safe, non-toxic alternative to rock salt, and it won't harm plants. Potassium chloride can be used to melt snow and ice.
Using rock salt can damage masonry and concrete. Salt left on these surfaces can lead to cracking and separation, which can also affect roads. It also can harm animals and plants.
A few alternatives to rock salt for driveways include calcium chloride and calcium magnesium acetate. These substances are more expensive than rock salt, but they are safer for the environment. Calcium magnesium acetate is a great "salt-free" alternative, but works slower. Calcium magnesium acetate is also more biodegradable, and does not harm plants or pets. However, calcium magnesium chloride can corrode metal and can leave residue on carpets.
Chemical deicing agents are also increasing in availability. These agents are often more effective, work at lower temperatures, but may not be compatible with salt spreaders, and may require specialized equipment (spray bottle) to apply.
When it comes to ice melt, calcium chloride pellets are the best solution. These pellets lower the freezing point of water, making it effective in melting ice. However, it's important to use this product correctly or it could damage your driveway or lawn. Spread all de icers evenly so that it covers the entire surface area and prevents concentration in one spot.
Calcium chloride is more effective than rock salt at melting ice, because of its special melting properties. It lowers the freezing point of water, releasing heat in the process. This means it melts ice quicker than other materials. This is what makes it a better deicer than rock salt and other salts.
While both salts are effective in melting ice, calcium chloride is better at melting ice in colder temperatures. It can melt ice in as low as -25 deg Fahrenheit . Sodium chloride, on the other hand, works only at temperatures between 5 to 8 deg Fahrenheit. Calcium chloride also works much faster than traditional rock salt. It's also less expensive and can protect against damage to concrete and asphalt.
If you want to keep your driveway and sidewalks safe during freezing winter weather, calcium chloride is the best option. It works better than rock salt in terms of melting ice, and is more accessible to the public. Calcium chloride can be used in driveways, sidewalks, and even on concrete and asphalt. It melts water in lower concentrations, so you don't need to apply large amounts of it.
Because calcium chloride is highly soluble in water, it creates a fast-acting brine solution. This process melts ice and snow much faster than rock salt. It also helps clear larger areas than rock salt does. Furthermore, calcium chloride is an exothermic compound, which means that it releases heat when reacting with ice and snow. This added benefit means that the product will work under temperature where over ice melt products may fail. Search for a product that comes in a resealable bag or bucket, has a pellet shape rather than flake. Some home center retailerrs may even have same day delivery during winter months, as an added benefit when the weather is unpredictable.
Despite its irregularly shaped particles calcium chloride is still an effective choice for ice melt. Compared to rock salt, calcium chloride is less harsh on your driveway, concrete, and vehicle. Besides, it's cheaper too. It also causes less damage to concrete and asphalt. So, if you're looking for a solution to winter ice, calcium chloride is the best option.
Calcium chloride is also a useful dust suppressant and road stabilizer. Liquid form calcium chloride binds with fine dust in soil structures, and prevents it from dispersing. Additionally, it's used as a tire ballast agent. Because it is dense and cold-resistant, calcium chloride is an excellent option to keep tires from eroding.
When it comes to ice and snow removal, calcium chloride is a safer and more effective solution than rock salt. It melts ice and snow much faster than rock salt, which can cause rust in your vehicle. Broken vehicles are costly, so it's best to prevent them by using calcium chloride.
If you have a driveway that gets cracks during the winter months, it might be a good idea to use Gypsum ice melt. This material will not only keep your driveway safe, but it will also help to improve water infiltration in the soil. It will also improve the drainage of your soil, which will help to prevent erosion. The best part about using Gypsum is that you don't need to apply it as frequently as rock salt. This product is safe to use in your driveway, patio, and even on your lawn.
Gypsum is a naturally occurring mineral made up of calcium and sulfate. It is often used in agriculture to help plants grow and is also used to make cement and plaster. In addition to its use in landscape, gypsum can be used as a soil amendment. It can be spread over a lawn or directly applied to plants.
Gypsum is often found in rock formations, which are interlayered with limestone and shale. It was formed millions of years ago when oceans were covered with salt water. When these waters became dried up, the inland "dead seas" became more salty, causing various compounds to form.
Although rock gypsum may look similar to rock salt, it does not have a salty taste. It is softer than rock salt and can easily be scratched with a fingernail. It has a whitish, mottled appearance and is microcrystalline in composition. It is similar to chalk, but is calcitic, meaning that it does not bubble or react with acid.
While magnesium chloride does not have a lower freezing point than it's cousin, calcium chloride - magnesium chloride has the benefit of being more environmentally friendly. Not only does it work well for ice, it also has the capacity to melt snow.
When mixed with sand, magnesium chloride has the capacity to prevent refreeze and overnight ice formation on your driveway. This is because magnesium chloride does not pull as much moisture from the air, leaving the surface less prone to dilution and making it less slippery. Magnesium chloride is also safe for pets, as the chemical is rather bitter, making pets less likely to lick it and accidentally ingest it.
Just like with other ice melt options, there may be many grades of magnesium chloride on the market. Looks for a product that has a working temperature of -25 deg Fahrenheit or less. As mentioned before, because magnesium chloride doesn't absorb as much water from the air as other ice melt products, so storage isn't as critical - but some forms may be challenging to scoop or apply.
]]>There are many places you can purchase snow salt and ice melt near you. You can also look for big box retailers that carry them. These stores will display their snow melting products on the store shelves. These supplies will help you make your home and sidewalks safe for driving. Once you have all of the supplies you need, you can start melting snow and ice. Here are some of the options when it comes to ice melting salt.
Ice melt from salt can help you keep ice off of your car, sidewalk, and driveway in the winter. However, it's important to be careful when applying it, as it can damage plants and landscape. It may also cause rust if left on your car's paint or brake lines.
The ice melt compound may also affect surrounding areas, including waterways, fish, and man-made areas. With increasing concern for the environment, you may want to consider switching to a non-toxic ice melt. In addition, the chemicals in ice melt may contaminate groundwater. Salts in runoff water can also affect vegetation.
There are a number of different chemicals used to treat ice. While rock salt is the cheapest, it can also be toxic to plants and corrode metals and concrete. Alternatives include magnesium chloride, potassium chloride, and urea. These chemicals are less toxic and more environmentally friendly than rock salt.
While a number of products claim to be the best ice melt, it depends on the specific type of ice melt you choose. Some ice melt products contain rock salt, while others contain rock salt in pellet form. Regardless of the type of ice melt you choose, make sure to read the manufacturer's directions before putting it on your property.
Different types of ice melt are best applied in different temperatures. Know the best temperature for applying ice melt before you start clearing your driveway or sidewalk. However, keep in mind that different types of melt have different melting points. You should use the proper type of ice melt for your driveway or walkway to avoid unnecessary damage to your car and property.
Sodium, calcium, and magnesium chloride ice melt are excellent options for reducing the freezing temperature of ice. They also have the advantage of melting ice at lower temperatures than rock salt. They help keep the sidewalk and roadways safe even in the coldest temperatures.
Rock salt is mostly sodium chloride. When shopping for rock salt as ice melt or for snow removal, look for the purest variety. It's essential to choose the purest salt possible because it's more effective at lower temperatures and will create better traction. For best results, buy a marine-grade salt, which has a 99.99% purity and will disintegrate into water without leaving any grit behind.
It's also important to use the right amount with salt spreaders. Applying too much will result in uneven distribution, which is why you need to spread rock salt thinly. A good rule of thumb is to use four pounds of rock salt per 1,000 square feet of ground. If you find that you're using less than that, it's time to reapply. Also, remember that rock salt is harmful to the environment. It can seep into nearby waterways and degrade the ecosystem. Therefore, make sure to clean up any salt that gets on your property.
A third alternative to rock salt is buying from a reputable vendor. Many big box retailers carry this product, and their prices are often fixed according to a spur-of-the-moment buying trend. The only downside is that big-box stores can sometimes run out of it. However, a dedicated rock salt vendor won't have this problem. They'll have rock salt in stock and can even allow you to pre-order it for future use.
If you don't want to spend a lot of money, you can always buy a bulk supply of rock salt or deicing products. You can even buy a pallet of deicing products at wholesale prices. You can even use a hand-held salt spreader to distribute ice melt.
Calcium chloride is a common ice melting agent. It can help prevent falls and auto accidents by melting ice on sidewalks and driveways. It is also relatively safe for the soil and can be used at lower temperatures than sodium chloride. Calcium chloride is the preferred choice for many deicing professionals due to its low cost and rapid delivery.
Calcium chloride is more effective than rock salt in melting ice. It will work even in negative temperatures and melt up to eight times more ice in 30 minutes than salt alone. It is also a more cost-effective deicing agent than rock salt alone. However, it can damage concrete and asphalt, and can damage vehicles.
Calcium chloride comes in white pellet and is available at most hardware and garden stores. It can also be purchased online. Calcium chloride is the fastest-acting ice melting agent on the market. This chemical compound melts ice at temperatures as low as -25 degrees Fahrenheit. Calcium chloride also penetrates thick ice faster. This allows it to break the bond between the ice and the concrete.
One of the most convenient ways to use calcium chloride is through its pellet form. These ice melters contain about 94% of the mineral calcium chloride. As a result, they start generating heat once they come in contact with water. Their effectiveness lasts 24 hours, and they can melt ice in temperatures as low as -25 degrees Fahrenheit. Pellets are also the least expensive per pound, and most come in resealable bags. When not in use, these should be stored in an airtight container to avoid spoilage.
Calcium chloride is a soluble salt with a strong attraction to water and causes a chemical reaction. The reaction generates a significant amount of heat, making it an excellent ice melter. Because it generates heat, it works even in extremely cold temperatures. It's also faster than other ice melters.
Calcium chloride ice melt will dissolve the ice, preventing falls and auto accidents. This chemical will also dissolve particles trapped between toes and fur. Unlike rock salt, calcium chloride ice melt will not re-freeze.
Additionally, Calcium chloride ice melt is an environmentally friendly alternative to rock salt and works down to -25°F. Calcium chloride is used as pet safe ice melt. It is also effective at preventing the formation of ice and snow in vehicles. The granular material is available in several different sizes and is easy to apply to ice or snow.
Magnesium chloride is a more environmentally friendly alternative to sodium chloride. It is less damaging to surfaces and has minimal negative effects on the environment. However, it is more expensive. If you're looking for an environmentally friendly ice melting salt, you should check out magnesium chloride.
Magnesium chloride is an environmentally-friendly alternative to rock salt. It lowers the freezing point of water to -13 degrees Fahrenheit, which means it will not damage grass and plants. It will also be less damaging to asphalt and concrete. Magnesium chloride is also fast-acting and will begin the melting process faster than rock salt.
When you want to melt ice quickly and safely, magnesium chloride is the right choice. It has several advantages over sodium chloride and is environmentally friendly. It works faster and is less likely to harm vegetation. Unlike sodium chloride, magnesium chloride does not track, making it safer for the environment. It also melts ice at lower temperatures than salt.
Magnesium chloride is a natural mineral and is effective at melting ice in cold temperatures. It is also safe for plants and concrete surfaces, and poses very few threats to the environment. This is a highly effective hygroscopic de-icer and can function even in temperatures as low as -5 degrees Fahrenheit. It is also a safer option for heavily trafficked areas.
Magnesium chloride is also more expensive than sodium chloride. Moreover, it is not as hygroscopic as sodium chloride and is therefore less effective.
Magnesium chloride is a common ice melt salt. It is a salt of magnesium and chlorine and is available in various hydrate forms, including hexahydrate and anhydrous. Magnesium chloride is safer than other ice melt salts for the environment, as it is 3 times less toxic than calcium chloride. This salt is available in flake and pellet form and is easy to handle.
While many traditional ice melt salts are harsh and can cause significant damage to surfaces and vegetation, magnesium chloride ice melt salt causes minimum damage to surfaces and can be used on residential properties. The hygroscopic property of magnesium chloride allows it to quickly absorb water and initiate the melting process. The ice melt salt leaves minimal residue behind, and is safe for natural stone surfaces.
Unlike sodium chloride, magnesium chloride ice melt does not cause much damage to surfaces and is also safe for use around children. However, if children accidentally lick the magnesium chloride ice melt from the ground, they may ingest it and become ill. Magnesium chloride ice melt can cause irritation to the skin, eyes, and stomach. This type of salt is best used in moderate temperatures and will reduce the risk of corrosion on surfaces.
Magnesium chloride ice melt is more expensive than rock salt, but it's better for the environment. It releases fewer toxins into the environment and is biodegradable. It also doesn't corrode metals. Although magnesium chloride is more expensive than rock salt, it is the most environmentally friendly option, and is even approved for use at commercial airports. Magnesium chloride ice melt is also better for the environment than sodium.
]]>
Some of the options are sodium acetate, calcium chloride, liquid brine, or even beet juice. Calcium chloride is the best option for melting ice, but sodium acetate is also a great alternative, however, it can be a little more difficult to work with.
Recent searches indicate that shoppers are 29% more likely to purchase online if same day delivery or free next day delivery is available. If stores don't have reliable inventory or stock, online shopping provides convenience and unlimited availability, often coupled with free next day shipping.
Sodium acetate is a biodegradable deicer that is not toxic to fish or animals. It also has a long residual effect, which makes it ideal for ice melting in cold climates. It is approved by the FAA for use on commercial airport runways. Sodium acetate is available in pellet form and contains 97% of the active ingredients.
Another advantage of sodium acetate is that it has a lower environmental impact. This chemical has a lower melting point than sodium chloride, which is harmful to plants and water. Sodium acetate is also safer for hard surfaces because it is non-corrosive. It can work effectively even at temperatures below -25 degrees Fahrenheit.
Two of the biggest disavantages of sodium acetate is it's pricing and sodium content. Just like sodium chloride, sodium aceate contains sodium ions, which can be toxic for your pets, lawn, and trees if applied in excess. Look for a sodium free product if you are looking for a pet safe ice melt. And while prices will vary from store to store, sodium acetate snow and ice melt prices are typically 42% higher than conventional sodium chloride products found in store.
Calcium chloride is another effective ice melt. This chemical reduces the freezing point of water and generates heat to melt ice faster. Calcium chloride is also the least expensive of the two and relatively environment-friendly. It works best in colder climates, but is moderately corrosive. Sodium acetate, on the other hand, works well in cold climates, but is more expensive than competing products.
Calcium chloride is a common ingredient in ice melt products. It is also cheaper than sodium acetate. Its main function is to attract moisture and form brine, lowering the freezing point of water.
Magnesium chloride is also an environmentally safe ice melt alternative. They are also safer for pets and vegetation. They also melt ice below 12 degrees and are less harmful to the environment. They can be used around airports and buildings because they are less corrosive.
If you're looking for an environmentally friendly ice melt that's safe for you and your pets, you should consider calcium chloride. This product melts ice up to -25 degrees Fahrenheit and also a pet-friendly alternative to rock salt. However, it should be used sparingly, as a little goes a long way. Using calcium chloride in moderation is crucial to ensure your property's safety.
Calcium chloride is a chemical compound that can be made into an ice-melting solution by combining with water. The resulting solution is highly soluble in water and attracts moisture from its surroundings. It then creates a brine that melts the surrounding ice. The process of melting ice produces more water than it consumes.
Calcium chloride for ice melt is safe for use on ice and snow, but excessive usage can cause dryness. However, calcium chloride for ice melt is not harmful to concrete and asphalt. When used appropriately, calcium chloride for ice melt is safe and effective at -25 degrees Fahrenheit.
Among the many uses for calcium chloride for ice melt, the most common is in deicing. The compound absorbs water from the atmosphere to form a brine, which then melts more ice. It also removes harmful dust from the air. Because of its unique properties, calcium chloride is much more efficient than rock salt and other alternatives.
Ice melt liquid brine is an inexpensive solution for anti-icing. Like rock salt, it works by breaking down the ice and preventing it from bonding to the surface. But unlike salt, which must undergo a chemical reaction with water before it can be used, liquid ice melt can be applied before the snow starts to fall. It works more slowly than salt, but still keeps the surface free of ice.
Liquid brine works at lower temperatures, so it is more versatile than rock salt and is therefore more effective in cold climates like Chicago. It also reduces contaminants in the water, protecting freshwater plant life. However, you should remember that brine is not as effective on cars as rock salt. Because the liquid brine is already pre-dissolved, it can be applied virtually at any temperature, increasing its effectiveness.
Liquid ice melt is an environmentally-friendly option, but it is not a good choice if you're concerned about spilling the ice melting solution on landscaping or natural areas. In fact, liquid ice melt may not even work as well in these cases. You should always check the label to make sure the product you're using is safe for the environment.
Another liquid option is CryoMelt C. This bio-polymer is green in color and free from magnesium and calcium chloride. It can be mixed with salt brine to make a road-ready blend. This solution is ideal for anti-icing and prewetting operations. You can also use 30% Magnesium Chloride Solution as an alternative to liquid calcium chloride. It's perfect for pre-wetting rock salt, and can be blended with salt to form a "Supermix" style mixture.
When it comes to snow removal, it's important to have the right supplies on hand. If you're not prepared, your business could get a hit from the end-of-season snowstorm. Bulk-outing your supplies can save you money and help you stand out from the "chuck in a truck" guys. Taking stock of your inventory before buying a brine maker will ensure you're prepared.
If you live in an area where ice and snow are a problem, you might be looking for a way to deal with it. A new type of snow melt is making its way to the market, and it uses beet juice to reduce the freezing point of ice and snow. This type of ice melt is safe to use on cars and other surfaces, and it does not cause any pollution. Its natural anti-corrosion properties make it a safe alternative to conventional salt. Additionally, it can be used as a pretreatment to prevent ice buildup and reduce the amount of deicing material required.
While salt melts are known to have some negative environmental consequences, beet juice melt has fewer. Because the solution contains sugar from beets, it lowers the freezing point of ice, which makes it less likely to form. This means fewer ice melt disasters!
Another advantage of this type of ice melt is that it is pet-friendly, meaning you won't have to worry about damaging your property. Using beet juice, however, does require that you have a sprayer. You can use a hand-held sprayer, but an electric one is simpler to use.
Beet juice salt is an alternative to rock salt and has become more widespread in the past decade. While some municipalities were slow to adopt beets on their streets, it has been widely used throughout the country.
While beet juice salt is a green alternative to traditional salt that does not harm the environment, there are several major disadvantages to using beet juice as an ice melt or a deicer.
The working temperature (-2 degrees Fahrenheit) is significantly higher than conventional rock salt or calcium chloride products. This means that some regions of the country, especially those impacted by severe and deep winter weather, will not benefit from the product's effectiveness.
The higher working temperature also means that the product is prone to re-freezing and forming ice crystals, especially when overnight temperatures dip into the negative. This re-freezing can cause damage to cracked concrete, damage driveways, and make sidewalks and block pavers slippery.
Price - this is the final and the biggest limitation of beet juice as an ice melt product. Because the product is derived as a by-product of sugar beet production, transportation and usage make the solution prohibitively expensive for most homeowners. The other drawback is that the product is often provided in a liquid format, requiring complicated sprayers to apply. Compared to traditional granulated or pelletized ice melts, which can be spread by hand without the requirement for further equipment.
While there are lots of options for choosing an ice melt product this winter - the biggest piece of advice we can offer, is to stay prepared and plan ahead of time to clear snow and ice around your home or business. This means ordering equipment in advance and applying any pre-treatment ahead of any winter storm events. Choosing to wait until the last minute, or when the storm has arrived, can mean shortages of vital tools and equipment - and this can mean the difference between staying safe and risking your life during unpredictable winter weather.
Cheers!
]]>We discuss when you should be aerating your lawn? To no surprise, it really depends on where you live and which grass variety you are cultivating.
]]>So, is the best time to aerate lawn spring or fall?
The best time to aerate the lawn is in the fall season. However, it largely depends on the type of your lawn grass. Warm-season grasses require aeration in the late spring, while cool-season grasses would benefit from early fall or early spring.
The rest of this article will explain a few things about the topic in great detail, including why and when you should aerate your lawn.
Thatch buildup and soil compaction inhibit the flow of air, water and minerals to the grassroots. As a result, the grasses eventually become weak and die out.
Aeration creates small holes to address this problem. It alleviates soil compaction and promotes penetration of air, water and nutrients to reach the grassroots. Consequently, the grass can make use of these resources to grow thick and healthy.
If you haven’t aerated your lawn in a while, you will notice a significant difference even after a single aeration.
Although there is no best time to aerate your lawn, studies suggest that it is ideal to carry out aeration during the fall season. But the truth is the ideal time to aerate your lawn is mostly dependent on the type of grass you have.
For warm-season grasses common in the Southern lawns, late spring or early summer is ideal for aeration. Bermuda grass and Zoysia grass are examples of warm-season grasses.
On the other hand, cool-season grasses common in the Northern lawns will benefit from aeration during early fall or early spring. Kentucky bluegrass and Bentgrass are examples of cool-season grasses.
Additionally, signs like compacted soil, patches in the soil, and thinning of grass are signs that the grasses are not getting adequate nutrients. If you notice these red flags, it might be time to aerate your lawn.
In short, the best time to aerate lawns is always right before the grasses grow actively. Aeration, when coincided with active growth of grass, will result in enhanced absorption of air, water and minerals by the roots.
Generally, spring is not considered an ideal time for aeration of lawns because weed seeds germinate in the spring. So if aeration is done before the active growth of weed seeds, these unwanted plants will flourish on their own.
Weed pressure is minimal during fall, so you might want to stick with fall for aeration.
For healthy lawns, aeration should be done once a year. If soil compaction and thatch buildup occur frequently on your lawn, it is best to aerate it twice a year.
Some home-owners recommend aerating lawns on an as-needed basis. For instance, if you notice signs such as thinning of grass or worn areas, or puddles, it is time to aerate your lawn.
Although aerating every once or twice a year is the most common recommendation, the frequency of aeration depends on a few other factors.
Aeration is needed more frequently in such areas to ensure that the grassroots are getting sufficient air, water and minerals.
Soil compaction mostly occurs in heavily trafficked areas, such as playgrounds. Lawn areas, where the soil is highly dense, will also result in compaction of the soil frequently.
If soil compaction frequently occurs on your lawn, it indicates that aeration is also needed more often. Aeration will create holes that will help the roots expand and utilise the air, water and minerals coming in through the pores.
Therefore, if you notice thatch buildup often, you should aerate your lawn more frequently.
To sum up, the best time to aerate the lawn is right before the growing season of the grass on your lawn. Generally, the fall season is ideal for aeration. However, certain types of grasses, such as the ones that grow in the warm season, would benefit from aeration in late spring.
It is also advised to look out for signs that indicate the need for aeration. Some of the signs include soil compaction, thatch buildup, and thinning of grass.
Keep in mind that proper maintenance and timely aeration will go a long way towards growing healthy and beautiful lawns.
You should not pick up plugs after aerating. The soil plugs that are left behind after aeration will contribute nutrients and microorganisms to the soil. However, if there is a large buildup of plugs after aeration, remove some of them to prevent blocking of air and water from entering into the soil.
It is advised to water the lawn every day for the first two weeks following the aeration. Remember to water in short bursts, for a period of 15 to 20 minutes. This is to keep the soil moist after aeration.
]]>Soil conditioning for lawns has 4 fundamental factors: improving the tilth, nutrient holding capacity, water holding capacity, and organic matter in the soil.
]]>Regardless of the type of soil you have underneath your lawn, it can all become compact and need a little TLC. Soil conditioning (yes, soil conditions for lawns) is meant to improve various aspects of the soil’s quality. The health of your lawn’s soil is central to its productivity, texture, and lush beauty. Let’s look at some of the aspects of soil.
Before you begin any conditioning on your soil we suggest that you have your soil tested to see what it needs. You don’t want to rush out and buy lawn fertilizer if there is no need for it. You can buy testing kits and do the test yourself or you can have a professional come out and give you the run down before you take any further steps.
Fertilizer - Lawn fertilizer works together with the important nutrients in your soil. It replenishes and replaces the essentials your lawn needs to look and feel amazing. In order for soil to be as rich as possible it needs three key elements: phosphorus, nitrate, and potassium. If the soil is lacking in any of those ingredients then you will want to use some natural lawn fertilizer. However, if your lawn has too much of something it can have adverse effects which is why soil testing is essential.
Aeration - There are two ways you can aerate your lawn and soil and they are liquid aeration and mechanical core aeration. The sole purpose of aeration is to open up and loosen the subsoil. This allows air, water, and nutrients to penetrate deep into the soil, surrounding the existing root structure of the grass. It gives the grass’ roots space to grow and thrive. Aeration promotes the development of healthy topsoil which increases the richness of it. This will improve the overall quality of the soil and your lawn.
Mechanical core aeration uses a machine to aerate the lawn. A lawn aerator can be rented or purchased and attached to a riding lawn mower. It uses hollow tines that mechanically removes plugs or “cores” of soil and thatch from a lawn. One of the old-fashioned methods is to use a pitchfork to poke the holes in order to aerate your lawn which can take forever depending on how large of an area you plan to aerate. A slicing aerator is another machine that can get the job done but instead of leaving holes it simply slices the lawn leaving the soil in place.
Mechanical core aeration is going to cost more money whether you rent an aerator or purchase one. Renting a core aerator can cost about $60 for four hours or $90 a day depending on where you rent from. Purchasing an aerator can cost anywhere between $200 - $5,000 on average. Keep in mind it depends on the type of aerator you purchase. If you’re not going to use the equipment often why waste the money?
All-natural liquid lawn aerators can provide the same stunning results as a mechanical core aerator without the high cost and excessive work. It comes in a concentrated formula that you will mix with water. The cost of a liquid lawn aerator is only about $35. You can find sprayers that hold a gallon of the formula mix for about $10. So for about $50 you can cover 30,000 square feet of your lawn and it is believed that it will actually penetrate deeper than the mechanical core aerators.
Liquid aerators take a little longer to work but they get the job done effectively. As the solution makes its way deep down into the soil it naturally breaks down dense clay particles which opens up small channels to help the aerification process. Liquid aeration requires multiple applications in order to ensure sustainable results but even then it is more affordable. In the end it provides complete and total coverage to your lawn’s surface.
Conditioning your soil will enhance your lawn in so many ways. It will be more beautiful, fuller, and healthier. It’s good to test your soil before doing any work such as adding fertilizer just to be sure you’re adding what it needs and not giving it too much of a good thing. Remember, not all soil is created equal. If you think your lawn seems dull and lacks the luster it should have then you may want to consider soil conditioning to improve your soil, lawn, and the plant life that grows there!
]]>Having a frozen and an ice deck sucks. Cleaning it can suck even more. Woods gets incredibly slippery when iced over - and de icing it takes a bit of skill.
]]>Therefore, with winter in full swing, it's only natural that you will be looking to stock up on those crucial supplies of ice melt. But traditional ice melt for wood decks doesn't stand up to scrutiny when compared to more-effective solutions on the ice melt market.
This article will run through what you need to aware of when keeping your wood deck and steps free of ice this winter, as well as walking you through how to keep it that way. We'll also delve into the reasons why calcium chloride ice melt presents the best solution for protecting your wooden surfaces, preventing you from slips and falls, and ensuring your pets don't suffer injuries.
For residents of Canada and most Northern states of America, winter will exposure your wooden deck to plenty of moisture in the form of rain, snow, and ice. Water and moisture have a damaging effect on wood, and even the best water sealants can only offer so much protection.
As a deck construction material, wood is much more naturally porous than similar counterparts, such as plastic composites or concrete. This means that as water infiltrates the wood during the day, it expands once temperatures plummet overnight, causing it to crack, splinter, and buckle.
With each freeze-thaw cycle, the damage is compounded as the wood becomes even more porous, and any sealant you've applied becomes worthless. Therefore, it's vital to keep your deck free of ice throughout the winter to best protect your investment. But there are other pertinent reasons for clearing snow and ice from your wood deck and steps too.
Even just one winter storm can dump enough snow to present a serious threat to the load-bearing capacity of elevated decks. A poorly-maintained deck left untouched during the winter could quite easily collapse if under the pressure of sufficient snow and ice.
The other reason you'll want to keep your wood deck free of ice and snow is, of course, for access purposes. Wood is perhaps the most slippery surface when covered in ice and can lead to nasty injuries sustained in falls. Wooden steps descending from elevated decks to the ground level present the most significant slip risk. Thus, you'll want to use an ice melt for wood steps as well as your deck.
Suppose you are unsure as to what state your wood deck is in heading into this winter. In that case, you assess its fitness against the criteria set out in the North American Deck and Railing Association's Deck Safety Checklist. Or, should you wish to, you could call a professional to perform a pre-winter inspection.
So now you've understood the importance of protecting your wood deck this winter, let's take you through what you need to be doing to protect it.
Before you even get to the point of utilizing an ice melt safe for wood decks, there are several best practices you need to follow to both protect your wooden surfaces and to make the job of the de-icer much easier.
In the aftermath of a snowstorm event, your first step should be to shovel snow from the deck area to expose the ice for an ice melt product to work. However, many homeowners make several mistakes at this stage. So let's run through some of the common errors to avoid.
First and foremost, do not use a metal shovel. While it may be tempting to use a sturdy metal shovel to make your way through the snow and ice settled on the deck's surface, the edges of a metal shovel are notoriously sharp. Therefore, it's highly likely that you'll end up scratching and denting the deck in the process of removing the upper layers of snow. Instead, use a plastic, composite, or rubber snow shovel for your snow-clearing endeavors.
Next, make sure to note which way the planks of your deck face before the first winter storm arrives. Ideally, you need to run your shovel in a direction that is parallel to the deck boards. Shoveling across them is bound to see you accidentally catching the sides of the deck boards, ruining the surface. The damage you inflict may be much worse with a metal shovel, but make no mistake, even rubber versions can leave unwanted marks by going against the direction of the boards.
The other mistake some homeowners make is that they try to chip away at the ice on the surface of their wood decks with their shovel. Again, no matter the shovel material, this is a bad idea that is likely to leave unsightly indentations on your deck. You should leave the melting of ice up to the ice melt product you buy. At the end of your shoveling activities, you want to aim for a thin layer of snow that can be swept off with a firm brush to expose the ice.
The next mistake many homeowners make when aiming to protect their wood deck is purchasing an ice melt that ends up doing more harm than good. One such example is sand. For some reason, sand is a popular choice as a wood deck de-icer. However, there are several issues with using such a product as an ice melt for wood decks.
Firstly, sand is an abrasive material. What that means in practical terms is that every time you walk across a sand-covered deck, you will leave a trail of scratches behind. You won't notice the problem until spring arrives when it will suddenly appear as though you've spent all winter scrubbing your deck with a steel wool pad.
The second issue with sand is that it tracks everywhere, exacerbating the problem outline above and potentially causing issues with trailing sand into your car, home, or even the office. Finally, for sand to have any effect, you need stock up on literal tons of it to continuously spread throughout the winter, rending it both expensive and ineffective.
The most popular choice for de-icing wood decks is rock salt, but again, there are numerous issues with this product. For a start, wooden decks are almost always secured with metal bolts and supports. Therefore, adding a salt-based de-icer is going to cause issues with rust and corrosion of those parts. In the case of elevated decks, this could be a real cause for concern, as rusted out supports could lead to a catastrophic collapse.
But rock salt's negative qualities are not merely limited to the metal infrastructure supporting your deck. It also damages the wood itself. Rock salt dries out wood, affecting the natural expansion and contraction process of wood and causing the deck to corrode. Due to salt's effect on timber, it's never recommended as a safe ice melt for wood decks.
Last but by no means least, the shape of rock salt crystals should be a cause for concern for homeowners. Firstly, if you think that sand is abrasive, just wait until to track rock salt all over your deck. The sharp jagged edges of the rock salt substance can leave deep, nasty scratches on the wood's surface that could be cause for anger and frustration when barbeque season rolls around.
Secondly, rock salt is the silent enemy of our four-legged friends. The sharp and jagged edges of rock salt we just mentioned can cause lacerations and abrasions to cats and dogs' feet. These small chunks of rock salt often become lodged between toes or caught up in the fur surrounding the footpads, which prolongs contact with their skin causing irritation and pain for our beloved pets.
Thus, you need to buy a safe de-icer for both your wood deck and your pets. That comes in the form of a calcium chloride de-icer.
Calcium chloride provides the answer for homeowners looking to clear their wood decks of ice and snow while avoiding the fate of inflicting any unnecessary damage. As it's a calcium-based ice melt, it doesn't have any of the issues associated with sodium-based alternatives such as rock salt (sodium chloride).
Unlike sand and rock salt, calcium chloride products such as Eco Garden's Snow and Ice Melt are made up of tear-shaped prills that disintegrate immediately upon contact with water-based substances such as ice and snow. Thus, the advantages are two-fold. First, this ice melt for wood decks isn't abrasive, meaning it won't leave any marks on your wood. When spring rolls around, it will be scratch-free, provided you follow the advice laid out above.
Secondly, since calcium chloride almost immediately dissolves into a liquid brine, there's nothing left behind that could potentially get stuck in between fur or toes. Even if your dog or cat were to step out immediately after you applied calcium chloride ice melt, the smooth, rounded edges wouldn't pose any issues for your beloved pets, and they would soon dissolve regardless.
Lastly, when compared to rock salt or sand, you don't need to apply anywhere near as much product to your wood deck to keep it clear of ice this winter. Just a few pounds of calcium chloride ice melt can have your wood deck de-iced in minutes. This is thanks mainly to its exothermic properties (meaning it naturally attracts moisture and generates its own heat).
Therefore, once you've taken care of the initial snow shoveling, all you have to do is spread a few pounds of our wood-safe ice melt and let the prills get to work. You can return a few minutes later to witness the powerful effects of calcium chloride and walk on your deck without slipping. You also better protect your wood, as we'll now explain.
As mentioned, as a homeowner, your thoughts shouldn't merely be preoccupied with clearing high-traffic areas of your deck so you can make safe passage across it during winter. It would help if you also thought about protecting the wood itself to ensure your deck investment doesn't go to waste.
That's where calcium chloride-based de-icer holds a considerable advantage over traditional solutions such as rock salt. As explained, the issue for wood is that it's naturally porous. During the winter, water will penetrate your wood deck. However, when it freezes, it expands, creating upward pressure on the boards, potentially causing cracking, buckling, and splintering. If left untouched, frozen wood may stay in that state for months, which isn't good, but at least it isn't continually contracting and expanding.
However, by adding rock salt, you increase the number of freeze-thaw cycles dramatically. While it may thaw ice on your deck, rock salt only continues to work as a de-icer up until the temperature reaches 20°F (-6.67°C). After that temperature is breached, it begins to freeze. Given how cold it can get in winter, this tends to occur regularly, exacerbating the problems freeze-thaw cycles present to your wood deck and steps.
By contrast, calcium chloride pellets can work right down to a temperature of -25°F (-31.67°C). As a result, not only will you benefit from the fact that the product continues to melt ice at such low temperatures, but it will also maintain your wood in a continual state of thaw in all but the most extreme winter locations in North America.
The question on your lips now might be where can you get hold of such an effective ice melt that's deemed safe for wood decks? Fortunately, we have the answer.
With cold winter temperatures already with us, now is the best time for you to stock up on your ice melting supplies for your wood deck. But you must invest in a product that is both much more effective at melting ice and is deemed safe for wooden surfaces. Therefore, it's time you made the switch to the more effective, wood-safe calcium chloride.
With industry-leading practical working temperatures going down to as low as -25°F, our Eco Garden Calcium Chloride Snow and Ice Melt allows you to protect yourself from suffering any slips or falls without inflicting any of the unnecessary damage to your wood associated with sand or rock salt. Better yet, you can relax in the knowledge that your wood deck isn't undergoing regular freeze-thaw cycles and that your metal infrastructure is safe from corrosion.
So what are you waiting for? We now offer free shipping available on orders over $35 for a limited time only, so make sure to stock up on your supplies of calcium chloride ice melt before they sell out!
]]>We help you narrow down your search when it comes time to pick a fertilizer for your hybiscus plant.
]]>
Although hibiscus isn’t too fussy, using the wrong fertilizer, or even over-fertilizing with the right fertilizer, can spell disaster for the plant, so you need to try to get things right from the start. Here’s how…
Every plant has its own nutrient requirements, but the three main ones are nitrogen (N), phosphorous (P), and potassium (K).
Although hibiscus doesn’t need much phosphorous, it requires high amounts of nitrogen and potassium, meaning that any fertilizer you use should cater to this. Of course, buying specific fertilizers for each of your plants can end up quite costly, but hibiscus responds really well to all-purpose formulas too.
Hibiscus also needs a wide range of micronutrients, which the soil alone can often fail to provide. Many chemical fertilizers lack these nutrients too, which is why gardeners in-the-know will always opt for a liquid seaweed fertilizer when they want their hibiscus plants to truly flourish.
Liquid seaweed fertilizers are known for being great all-rounders, and can work wonders with hibiscus.
Did you know that seaweed contains 10 times the number of minerals than plants grown on land?
Imagine what all of those micronutrients could do for your hibiscus, as well as the soil around it…
If you pick the right product, you won’t need to worry about over-fertilization either, as there won’t be any excessive build-up of minerals. Liquid seaweed is water-soluble and contains the perfect level of nutrients for hibiscus plants.
A quick Google search will show you that there are numerous seaweed fertilizers out there, but a surprising number of them are non-organic. You’ll be using this product in both the soil as well as on the leaves of your hibiscus, so pick a trustworthy brand.
One company known for their dedication to producing organic gardening products is Eco Home & Garden Solutions. Their Liquid Seaweed Fertilizer is fully natural and organic. It comes from a mix of oceanic kelp and other types of seaweed, meaning an incredible mixture of nutrients, and it’s all sustainably harvested and completely renewable.
You can use this formula on all types of plants, from fruits and vegetables to flowers, including hibiscus. Seaweed is also rapidly being recognized as a great alternative to chemical pesticides, making it worth using throughout your garden. Click here if you would like to give this powerful kelp and seaweed blend a try.
A liquid seaweed fertilizer for hybiscus should be applied every one to two weeks for best results. However, it’s understandable that life gets in the way, so if you’re only able to fertilize your plants a few times a year, these are the four key stages at which your hibiscus would really benefit from a feed:
Generally, more feed is needed during the spring and summer, since this is when your hibiscus will be most actively growing. You can then cut this back in the fall, with your last feed applied at the beginning of winter.
If you’re growing your hibiscus in a container, then you will likely need to fertilize more often than if you were growing it in the ground. Being a heavy drinker, a pot-grown hibiscus will also need extra water, so give it a diluted feed of liquid seaweed each time you water your container plants. As mentioned, you don’t need to worry about over-fertilizing if you’re using seaweed, especially if you’re diluting the formula down even more.
The best time of day to fertilize your hibiscus would be in the early morning or early evening. You want temperatures to be cool and wind speeds to be low - this will ensure that all of those nutrients reach the roots of your hibiscus as quickly as possible.
Fertilizer application methods vary depending on the product you’ve picked. If you’ve opted for a seaweed fertilizer, this will need to be diluted in water and then applied to the soil around your plants.
If you only have a few plants to feed, a watering can is often the easiest way to do this.
However, if you would prefer to use a hose, it would be worth investing in a fertilizer injector. This is a hose attachment that you pour the concentrated fertilizer into. Small amounts of fertilizer are then released with the water being expelled from your hose. Since all plants, including your lawn, would benefit from a dose of seaweed, this is a good option for those who have larger areas to cover.
Special fertilizer injectors can also be found for drip irrigation systems, making it easy to incorporate a liquid seaweed fertilizer into just about every watering system.
One thing to remember when using a fertilizer for hybiscus is that you should be applying the solution right up to the edges of your plant’s canopy. Don’t focus your attention solely on the soil directly around the main trunk, as the plant’s full root system will extend quite a way out from here.
Foliar sprays are applied directly to a plant’s leaves and stems, rather than to the soil. This is because there are certain essential elements that plants absorb better through their leaves - this method can actually deliver micronutrients to a plant faster than if you were to fertilize the soil.
Not all plants benefit from a foliar spray, but hibiscus is one that most definitely does.
One of the most popular foliar fertilizers is kelp or seaweed. Being completely natural, this won’t harm your hibiscus in any way, even if you apply it with a heavy hand. Plus, in addition to providing your hibiscus plants with vital trace elements, seaweed also strengthens plants in a way that makes them less susceptible to pests and diseases.
If you already use a liquid seaweed fertilizer in your garden, simply dilute this down a little more than you usually would, and then spray your hibiscus leaves a few times a year. Don’t forget to also spray the undersides of the leaves too!
Ideally, do this early in the morning, while the air is still cool. This will ensure that the leaves are able to absorb the formula before the sun evaporates it away.
When it comes to potassium, hibiscus is a heavy feeder. Potassium is involved in just about every stage of plant growth, so supplementing your hibiscus plants with extra potassium can really make a difference.
Don’t worry, this doesn’t mean that you need to buy yet another fertilizer product. Instead, look into some of the ways in which you can make a homemade potassium fertilizer for hybiscus.
Banana peels are known for being packed with potassium. Try soaking a few peels in water for a week or two, allowing them to ferment. You can then use this water as an additional fertilizer.
Wood ash is also rich in potassium. This can simply be sprinkled into your compost. Another alternative would be coffee grounds, which can be mixed into your soil. This will also help to slightly raise acidity, which is something that hibiscus enjoys.
Another way to provide a slow-releasing source of nutrients to your hibiscus plants is with a mulch. A mulch serves a number of different purposes, including:
In a way, hibiscus mulches itself. It continuously drops leaves and flowers throughout the year, and these settle around the base of the plant and act as a mulch.
However, in order to experience all of the benefits listed above, you will need to apply an additional mulch too. Some good mulch materials are:
You will notice that there are also many synthetic mulches out there, from simple fabric coverings to shredded rubber. While these may be effective at suppressing weeds, they won’t feed your plant, making a natural mulch a much better option.
Simply spread your mulch of choice around your hibiscus plants, keeping the mulch a few inches thick. Make sure that the mulch isn’t directly touching the stems of your hibiscus - this will prevent your plant from breathing, which could lead to rot.
The best times to apply a mulch is in the early winter and early spring, as this prepares the plant for the upcoming seasonal changes. In the summer and fall, give your mulch a quick mix through to aerate it, which will prevent mildew or fungus from forming within it.
Hibiscus is generally quite an easy to look after, low-maintenance plant - you could potentially get away with not fertilizing your hibiscus at all. However, if an abundance of bright, showy blooms is what you’re after, along with a plant that only seems to do better year after year, then a good quality fertilizer for hybiscus is exactly what you need.
]]>We look at what it takes to use a herbicides and weed killer near ponds, lakes, and rivers - what to look for and what to avoid.
]]>Many herbicides can be harmful to plants and animals when administered into the ground or near open water. For this reason, natural and organic herbicides are the best resource to avoid potential harm to the environment. Acetic acid and sodium chloride are two safe, natural agents to consider.
Applying the proper types of herbicides is crucially important to maintain safety near water. Read on to discover safe herbicides to use near water and how to administer them. This article will also explore how some herbicides can affect open water and its surroundings.
Open bodies of water are not just scenic and tranquil, they are also important ecosystems within an area. Once harsh or toxic chemicals are introduced to ecosystems, the natural balance of the body of water is thrown off. This is what can occur when herbicides seep into or leach into bodies of water.
Problems that arise from the use of synthetic herbicides near bodies of water are found in both the chemicals the amount applied by the user. According to the Cambridge University Press, the ways in which synthetic herbicides are administered near open water, in high volumes, and to the surrounding soil, can cause deadly effects to aquatic organisms.
Therefore, the problems with synthetic herbicides are not just seen with post-emergent herbicides, herbicides applied into the soil can also cause problems. Let’s take a look at each area around open water and how synthetic herbicides can disrupt it.
Weeds can grow in abundance near open bodies of water, such as ponds, streams, or river banks. It is only natural to want the weeds removed, and herbicides are the best way to address this is the issue. When using a pre-emergent herbicide in the soil around bodies of water, the chemicals can escape into the water through a process known as leaching.
Furthermore, post-emergent herbicides can also run-off the weeds and easily flow into the body of water.
The mechanism of action for synthetic herbicides is based on attachment to organic particles and compounds. Once the herbicides leak or leach into the water, the chemicals bind to the organic matter or organisms, causing degradation or death.
Pre-emergent herbicides that seep into the water can be even more detrimental to aquatic plant and animal life. The herbicides become concentrated in the mud found at the bottom of the water source, thereby contaminating the water source and its living matter for upward of three months.
Synthetic herbicides can affect the central nervous system of a range of aquatic animals, including invertebrates and even fish. The smaller the organism is, the more potent the effect of synthetic herbicides there can be. For aquatic animals that forage through the muddy bottom of a body of water, the chemicals can be eaten.
The same concept applies to animals that eat aquatic weeds and plants. The chemicals create a transparent outer layer on the weeds, which is then ingested by animals. Since synthetic herbicides accumulate rapidly once applied, the chemical concentrations then become attached to food sources and habitats of aquatic animals.
There are some herbicides that are approved for use near water. With this in mind, the possibility of drift and leaching are apparent, which can cause damage to other living matter in the water. The following is a list of synthetic herbicides that are not recommended for use near water:
No pre-emergent herbicides of any kind should be used near bodies of water. Leaching is almost guaranteed to occur, which would ensure that the chemicals are distributed throughout the water and mud at the bottom.
Herbicides that use natural substances in their mechanism of action to control weeds are best near water. You generally do not have to worry about toxic chemicals disrupting the water life cycle, and utilizing natural remedies to kill weeds is a healthy alternative for the environment.
Before you consider natural herbicides, it may be helpful to survey the body of water and the type of weeds needing to be eliminated. Are the weeds necessary for supporting the life cycle of the water ecosystem? Do the weeds help to filter water or create a buffer against embankment erosion? Removing weeds is essential to supporting the life cycle of plants, yet there may be other considerations near bodies of water.
Once you have established that weed removal is necessary, consider the use of an approved herbicide for water habitats only. Natural herbicides are almost always safe and approved for water. Let’s take a look at some approved herbicides for an area near water and a corresponding natural alternative to consider.
Glyphosate can be used near water; however, the risk is too great just to assume that the chemical will not seep off of weeds and end up in the surrounding water. As an alternative, consider using a product with acetic acid. This type of acid is used in the production of chemical compounds, which means that the acid can create natural repellents towards weeds.
Acetic acid can lead to the formation of ester, which is one of the most commonly used chemicals in some synthetic herbicides, such as triclopyr ester. This means that you can get a similar reaction in terms of weed control with a wholly natural substance.
Imazapyr is another popular synthetic herbicide that is approved for use near water. Although this chemical can kill aquatic weeds, the risk is too great due to drift that can attach to non-weed plants. As an alternative, you can use a product with sodium chloride, which is a derivative of salt. Sodium chloride is toxic to the parts of a plant that contribute to photosynthesis.
The natural substance acts by interfering with the ability of a weed to process amino acids from photosynthesis. This is similar to how imazapyr interferes with the production of amino acids when applied to weeds.
Natural herbicides do not directly cause toxicity in surrounding animal life near bodies of water. The processes of organic herbicides are easily passed if aquatic animals ingest natural substances, which is not the same with synthetic herbicides. Synthetic herbicides are persistent when applied in the soil, where accumulation occurs and causes damage for weeks at a time. Using a natural alternative presents no such problems.
Now that you know that there are safe and effective natural alternatives to synthetic herbicides, it is time to select the right product. Eco Garden Solutions Organic Vinegar Weed Killer is a 100% natural and organic formulation that is also safe for people and animals.
Our herbicide works by using acetic acid and sodium chloride to destroy weeds with completely natural reactions in the plant growth cycle. Our product works fast, sometimes in as little as 24 hours comes pre-mixed and ready to use.
The fear of disrupting the ecosystem around bodies of water is eliminated with this product, and you can rest assured that you are fighting against weeds in a natural and safer way when compared to toxic, synthetic herbicides.
While there are many synthetic herbicides that are approved to be used near water, there are still risk factors when administering such harsh chemicals. Both the soil and water itself can become contaminated, with potentially lethal consequences for animal and plant life both in and near the water.
Natural and organic herbicides are much safer to use near water and do not pose any toxic effects on aquatic wildlife. Consider using products with acetic acid and sodium chloride instead of disruptive synthetic chemicals that can disrupt the ecosystem.
Read on to understand the effects of weed killers on bees and how to protect the bees by using a bee safe weed killer.
]]>Initially, the assumption was that only insecticides affect bees, and most people safely obliged and kept off insecticides; however, the world population of bees continues to decline. The decline in the number of bees accrues to the continuous use of weed killers that are toxic to bees.
Read on to understand the effects of weed killers on bees and how to protect the bees by using a bee safe weed killer.
Many herbicides contain chemicals that disrupt the bees’ psychological and digestive system; this makes them more vulnerable to infection. Once you spray such a weed killer on blooming crops, the chemicals are gathered together with the pollen then taken back to their hives for foliage.
Once the bees consume such pollen, the whole hive is poisoned. Most will die out while the remaining few will migrate to other safe zones. Considering the importance of bees and other insects in the environment, you must use a weed killer that doesn’t harm the bee ecosystem.
To be honest, a determined farmer yielding a hoe is the best bee-friendly means to kill the weeds you can find. But if we are frank, this heroic mode isn’t always practical. Not everyone has the physical ability and time to weed the garden or farm by hand, especially when dealing with massive acres of land.
Therefore, to reduce the number of weeds in your garden, plan your garden using designs that include grouping plants placed close together to reduce the room for weed flourishing.
Another option is using a weed killer that is generally safe for the environment, including bees. The market has several weed killers, approved by relevant bodies, that are friendly to bees but will get rid of the weeds. However, if possible, you can consider using homemade products made from Neem oil, vinegar, Epsom salt, castile soap, essential oils, and chrysanthemum, as they are friendly to bees but will get rid of the weeds.
When it comes to herbicides, it’s always safe to use them with restraint, and only to the extent required to control the undesirable weeds. First, you can research the specific times that are best to use the weed killer to reduce the contact of the bees with the herbicide.
Apply the weed killer at night, early mornings, and in the late evening, which are the times that bees won’t be foraging. Between 8 pm and 8 am, the evening applications lead to minimum bee contact with the weed killer. If there are unusually warm conditions, make the application later in the evening or earlier in the morning. Warm conditions generally increase the foraging period.
Also, a ground application is less hazardous than an aerial application. Mostly because smaller acreages get treated at a time with a reduced drift; keep off spray planes turning over the fields. Especially when blooming weeds are growing. As a good neighbor, alert any nearby beekeeper, if not you, about the application to allow them to confine the bees.
Remember, the above pointers are only appropriate for a bee safe weed killer. Using the same strategy with a toxic herbicide still poses a risk. Even after spraying at night, residue concentrations are still left on the plants and could attract the pollinators.
It’s always safest to use weed killers when the weeds on your lawn are not blooming. Any spray that ends up on blooming weeds automatically ends up in the bees’ diet. Therefore, you could choose an appropriate time when the weeds are not blooming.
The second alternative is mowing off the weeds on your lawn before you apply the herbicide. Like the garden guideline, do not spray the lawn when it’s windy, do so later in the day, which will prevent it from drifting to flower beds.
Bees are among the most vital parts in maintaining a healthy ecosystem. Here are a couple of reminders why you want to ensure that the bees stay safe as you get rid of weeds.
Each year, bees pollinate billions of plants inclusive of millions of agricultural produce. Every plant requires a bee to transfer pollen from its male part, the anther, to its female, the stigma. Bees do this task when moving from flower to flower when searching for nectar.
Being pollinators, bees are vital to the ecosystem. They support the growth of flowers, trees, and other plants that serve as food for other creatures. The honey is also a food source. Their role in the development of trees also ensures all other wildlife can have a habitat.
Essentially, bees contribute to the complex and interconnected ecosystems that enable many species to coexist.
Glyphosate is the main compound in herbicides that harm bees. Research on the compound glyphosate has shown that it affects the honeybee’s behavior. Bees who come into contact with such herbicides have less success finding their way back to their hives.
Toxic herbicides also affect the learning ability of bees and make them less sensitive to sugar. Once the bees take pollen with glyphosate in it, it changes their gut microbiome. Many bacteria in a bee’s gut resemble that in plants, making it susceptible to glyphosate.
Exposure to the toxic herbicides decreases the honey bees chances of survival; if you intend to protect them, you need to use a safe bee herbicide.
Besides using home-made remedies and traditional methods of getting rid of weeds, you can always opt for bee safe weed killers. These are safe weed killers that have minimal effects on honey bees if used correctly.
Remember, bees are a vital link to not just agriculture but the general ecosystem in their essential role as the primary pollinator. Your plants’ successful growth is also significant to you, but the enemy is the weeds and not the bees. Help save the bees.
We provide a helpful guide for how to keep your rock garden clean and weed free.
]]>You’d be surprised how many people are dealing with this same issue. Weeds are just so stubborn they will grow even through rock, driveway, sidewalks, pavers, gravel, and mulch. It’s quite impressive, actually.
The good news is, killing weeds in rocks is not much different from killing weeds in the garden and lawn.
Turns out, you don’t have to spend loads of money on the best weed killer for rocks either. You can simply use some of the staple pantry items that you already have at home. Let’s take a look.
The most effective way to kill weeds in rocks is by using a weed killer.
Not just any kind!
Liquid herbicides are much better at spot treating weeds in between rocks and pavers than granular herbicides. Granular variety is better for treating wider, open areas infested by weeds.
Liquid weed killer will get into nooks and crannies where your garden hoe can't reach. You won’t need to lift a single stone to kill the roots underneath.
Here are other things you should consider before buying the best weed killer for rocks:
Concentrated herbicides are super potent and need to be diluted with water before use, according to the instructions printed on the packaging.
"Ready To Use" weed killers, on the other hand, come pre-mixed and don’t require any extra prepping steps. They are as convenient as it gets.
Killing weeds is already tedious enough, so the best weed killer for rocks might be one that is ready for immediate use.
Selective herbicides target only the specific weeds while spearing the other non-invasive plants. Buy a selective weed killer if you have decorative flowers, grass, and succulents planted in your rock bed.
Non-selective weed killers kill all plants. They are ideal for removing weeds from rock beds without decorative vegetation and for clearing driveways, sidewalks, and paver patios.
Contact weed killers kill only above-ground parts of the plants that come in contact with the active ingredients. This type of herbicide destroys the weed seeds that lay on the soil as well, to prevent them from sprouting.
Contact weed killers are great for weed control for common annual weeds like nettle, crabgrass, bindweed, mallow, and broadleaf weeds alike.
Systemic weed killers destroy the weeds from the roots. They are good for eradicating perennial weeds, like bindweed, ragweed, dandelion, and others.
Which type of herbicide you choose depends on the type of weed you have growing in your rock bed, annuals or perennials?
A natural weed killer for rocks will let you solve your weed problem in a safe and environmentally-friendly way. An organic weed killer will give you a sense of security, knowing that your kids and pets are not exposed to harsh or potentially toxic chemicals when playing in the backyard.
Resort to non-organic herbicides only when no other alternative works for you. Always use non-organic products sparingly and according to the instructions printed on the packaging.
A quick and natural way to kill weeds in rocks is by pouring boiling water directly on them. The scorching water will burn the leaves and kill the plants immediately.
Bring your tea kettle to a boil and take it out in the garden. Pour hot water directly out of the kettle onto the weeds. The nozzle of the kettle will give you precision while working, so you don’t splash yourself or nearby plants that you want to keep.
Another natural weed killer for rocks is white vinegar. The acetic acid will burn the foliage and kill weeds in your rock bed within hours.
To kill the weeds, spray undiluted 5% household white vinegar directly on the weeds. Make sure they are completely saturated. White vinegar is non-selective, so be careful not to get any on the decorative plants.
To increase the effects, you can heat the vinegar prior to use and let the temperature do its work. You can also try using horticultural vinegar with 10% or 20% acetic acid for quicker results.
Another natural way to kill weeds in rocks is to use good old rock salt or table salt. Does salt kill weeds you ask? The salt kills weeds by drawing the moisture out of them and dehydrating them. This applies to other plants as well! Be careful not to get any on the plants that you want to keep.
Rock salt is used as a weed killer in three different ways. Let’s take a look at each method:
Sprinkle rock salt directly on the soil, underneath or near the weeds. Spray the treated area with plenty of water to give the salt the chance to penetrate the soil.
Some landscapers strongly stand by this application method while others stay away from it. Here is why.
Sprinkling rock salt directly on the soil doesn’t give you enough precision. Precision is critical when working on rock gardens adorned with decorative plants. The root systems of the plants may be reaching further than you think. You might be sprinkling salt right where the roots are.
Mix rock salt with hot water in a 1:3 ratio. Add a little bit of liquid dish soap to it. It will help break the surface tension of the water and increase the absorption as a result.
Pour the solution directly on the weeds using a funnel or a small watering can. Be careful not to splatter any on the surrounding areas. Water your nearby plants with plenty of water when done to get any accidental salt spillage below the root zone.
Mix one cup of rock salt in a gallon of white vinegar. Let the salt dissolve completely before adding a teaspoon of liquid dish soap to the mixture.
Use this natural weed killer to spot-treat weeds. Make sure not to get any on your precious flowers. If you are looking for the best weed killer for flower beds – please check out our other blog post here.
Note: Don’t overuse rock salt as it can change the structure of the soil and make it uninhabitable to other plants for an extended time.
The best long-term solution for your weed invasion is landscaping fabric. If you are planning on building a new rock bed in your backyard, or plan on renovating the old one, don’t hesitate to lay down landscaping fabric first.
The landscape fabric will block the sunlight and keep weeds from growing. You won’t have to bother plucking the weeds ever again.
You don’t have to look far to find the best weed killer for rocks. You have all the ingredients to make a natural weed killer in your pantry. Try out different methods and see which one works for you the best.
You can also rely on an organic weed killer to bring your rock garden back to life in a safe and eco-friendly way. No more pulling out stubborn weeds by hand. You can retire your garden hoe for now and enjoy your rock garden in its full beauty.
Pumpkins that end up crowded out by weeds will be much smaller in size and the plants will generally be weaker.
]]>
Herbicides for pumpkins aren’t usually a solution that home gardeners initially consider, but weeds can be severely detrimental to your plants. Even if you’ve taken every weed-prevention precaution you know of, chances are that weeds will still appear.
While they’re sometimes easy to ignore, at least for a while, every weed in your pumpkin patch is absorbing important nutrients and moisture from the soil, depriving your pumpkins of them.
Pumpkins that end up crowded out by weeds will be much smaller in size and the plants will generally be weaker.
This isn’t only because of competition for nutrients and water, but also for light - it won’t be long before weeds are towering over the leaves of your pumpkin plants, preventing them from photosynthesizing.
Manually weeding your pumpkin plants is always an option, but weeding takes time. It’s also not usually an activity that many people actually enjoy. Imagine if you could spend that time doing something else in your garden?
This is where a herbicide for pumpkins comes in…
When it comes to herbicides in general, the first question to ask yourself is…
Since you’re most likely going to be eating your pumpkins, organic is the best option. There is more and more research emerging showing how chemical herbicides end up within the foods that they’re used around. This can have worrying long-term health effects, something you don’t want to be subjecting yourself or your family to.
Plus, being a gardener, chances are that you care about the environment. Chemical herbicides have a bad reputation for damaging the planet. They remain in soil and water for long periods of time, continuing to poison any plants, animals, or insects that come into contact with them.
If you choose the right product, then yes. A quality organic herbicide for pumpkins will be able to tackle both annual and perennial weeds. Whether you’re dealing with spiky thistles, rampant dandelions, or blankets of clover, the right organic formula can handle all of that and more.
Results can be visible in as little as 24 hours, and you’ll also have the peace of mind that your garden is safe for children or pets, as well as wildlife, to spend time in.
Most organic herbicides will be in the form of a spray, but soil herbicide options are available if you’re going for chemical.
However, soil herbicides should never be used around a vegetable bed. These are injected into the soil so that the surrounding plants soak up the chemicals, resulting in their death. There’s no way to control which plants end up absorbing those chemicals, so you don’t want to accidentally end up poisoning your pumpkin plants.
Spray herbicides may take longer to apply since you will need to target each individual weed, but this accuracy makes them perfect for use around food crops.
There are three stages to applying a herbicide for pumpkins.
Your very first application should be before you sow the seeds or plant out seedlings.
This will be the easiest application, since you’ll be working with a blank space and won’t need to maneuver your way around plants.
If you’re using an organic herbicide, you can sow or plant out immediately. However, if you’re using a chemical herbicide, you will need to check with the manufacturer. At least three days is usually recommended.
Your second application should be after your plants have started to grow. Wait until your plants have around five leaves and then apply your herbicide on any weeds that have sprung up around your plants.
As your pumpkins grow, you will need to thin them out to prevent over-crowding. Each plant needs enough space in order to successfully produce fruit. As you remove excess plants, you will likely notice several tiny weeds sprouting up in the soil left behind. This is the perfect time for your final herbicide application - you don’t want those weeds to get any larger.
After this, your pumpkin plants should be able to grow large enough to outcompete any weeds all on their own!
Whichever stage you’re at when it comes to applying your herbicide for pumpkins, always try to do this when the weather has been dry for a few days. Most herbicides work best on bright and sunny afternoons.
Don’t be tempted to apply a herbicide before or after a rainfall. The rain will only wash your herbicide away. Even where it doesn’t, it will end up diluting the formula to such an extent that it won’t have any effect.
Wind is another factor to take into consideration if you are using a chemical herbicide. While those who go for organic won’t really need to worry about this, strong winds can carry chemicals to nearby plants, which could end up harming your pumpkin crop.
Some herbicides for pumpkins will need to be diluted with water, while others don’t, so always check the label before use.
Ideally, you’ll be using a spray herbicide, so just set the trigger to the desired spray type and then point this directly at the weeds you are targeting. Cover the leaves of each weed, but don’t be tempted to spray into the ground. As mentioned above, you don’t want to end up harming the soil, and therefore your pumpkins.
Take care to ensure that the herbicide doesn’t end up touching the foliage of any other plants. You will usually notice a herbicide for pumpkins taking effect after a day or two.
A herbicide for pumpkins could be a huge game-changer in your garden. If you’re constantly battling the weeds year after year, give this a try. Not only will it save you from having to do so much manual weeding, but it will also ensure healthier plants, meaning larger, heavier, and tastier pumpkins.
]]>Timing when applying a weed killer can make all the difference.
]]>Weed killers should be applied when the weeds are preferably dry and active during the middle of the day. Spring and autumn are the best times of year to apply weed killers to ensure the weeds are consistently destroyed before the peak growing times during the year.
Applying weed killer properly is crucially important to ensure that the stray plants are effectively killed. Read on to discover when the optimal application times for weed killer are best, and to find out how you can keep your garden or lawn weed-free throughout the year.
A weed killer is a term that is used to describe herbicides, which are a range of various chemicals that effectively kill plants by interfering with the growing cycle. Herbicides can be broken down into two different varieties: pre-emergent and post-emergent.
Pre-emergent herbicides are designed to be administered into the soil of an area you wish to keep free of weeds. While post-emergent herbicides are the most common and administered as a spray directly on the weeds. Both types of herbicide work well, yet there are some considerations to keep in mind to ensure the efficacy of weed removal.
Since weed killer is a chemical formulation, and weeds can be helped to survive based upon the surrounding environmental conditions, it is important to keep the following in mind when using herbicides:
According to the International Journal of Agronomy, weeds are most active during the daylight hours when photosynthesis takes place, which means it makes the most sense to apply weed killer when the weeds are converting sunlight into energy. Peak times for photosynthesis typically occur during mid-day in the time between early afternoon and evening.
It is not recommended to administer herbicides early in the morning due to the high levels of moisture that has accumulated on the weeds. This moisture can effectively dilute the chemicals and render them weak or useless depending on how much moisture is present. The one caveat here is if you are applying weed killer during the hot summer months.
In this circumstance, weed killers should be applied in the early morning and early evening hours. This is because weeds will not grow actively during hot temperatures, therefore, the herbicides will not be properly absorbed into the weeds. During winter, the reverse scenario is in effect; weeds will photosynthesize during the warmest time of day, typically during the middle of the day.
As equally important as the time time of day to apply weed killer is also the time of year. Each season presents advantages and disadvantages to weed killer application. Let’s take a look at each season.
The spring season is undoubtedly the best season of the year to apply herbicides. Spring is a temperate season that starts off with cool weather and slowly transitions to the hot summer months. Ideally, you can administer pre-emergent herbicides in the early spring to stop the weeds from germinating, which can then be followed up with post-emergent herbicides throughout the rest of the season to effectively destroy the weed life cycle.
For maximum results, it is essential to apply weed killers during the spring to knock down the increased weed growth that can occur during the summer. Summer is not ideal for herbicide applications since the intense heat radiated by the sun can quickly dry out the herbicides.
Like spring, autumn is a transitional season and the conditions for applying weed killers are ideal. Weeds are slowly losing sunlight during the fall, therefore, herbicides can attack the weakened system of the weeds and also work well to keep the weeds inactive during the winter.
The winter months can be something of an easy target for effectively killing weeds. With this in mind, the application of a weed killer needs to be timed right to avoid the possibility of freezing overnight. Always apply herbicides during the middle of the day when the sun is shining strongly to disrupt photosynthesis. Active spraying during the winter can also ensure that the weeds are not allowed to germinate properly before the arrival of spring.
A weed killer is an effective tool in ensuring that weeds are destroyed throughout the year. The time of day and year are important considerations to keep in mind when applying herbicides. Spring is the best season to apply weed killer, whereas summer is less ideal.
Remember to apply weed killer when the sun is shining brightest to disrupt the photosynthesis cycle in weeds unless you are applying herbicides in the summer. With these tips in mind, you can rest assured that the weed cycle will be kept to a minimum and your plants can flourish in solitude.
]]>While lawn aeration is often overlooked, it is a critical step to keeping your grass healthy, and getting the most out of your fertilization program.
]]>Aeration is a very simple concept, but there are many positive reasons to complete aeration on your lawn. Lawn aerators are used for three main things. The three most significant benefits you will see from lawn aeration is a reduction in the compaction of the soil, helping grassroots multiply, and reducing lawn thatch.
There are several types of aerators, and there is a process for completing your aeration that you should follow rather closely. Completing this process at the right time of the year, when your lawn needs it the most, could significantly improve your lawn’s overall health.
There are two main types of lawn aerators on the market. They are spike aerators and core aerators.
With a spike aerator, you will have spikes or holes placed in your lawn at consistent intervals. Not turf is pulled up as the spike aerators are just a hole being punched in the ground. With the spike aeration, the holes will fill in rather quickly, and this is the best method of choice when you have sandy soils.
The other type of aerator, the core aerator, will pull an actual plug or core of dirt and grass from your lawn. When you use a core aerator, this is considered a deeper and more effective aeration; however, not all lawns need this type of aeration. The more compact and heavy your soil is, the better it is to use the core aerator.
Aerators for your lawn can be both manual or power operated. If you have a decent sized piece of land, you are going to need a power aerator. The manual process takes quite a bit of time as a person has to drive the spikes into the ground, pull up, and then place it down again. With a manual aerator, you can use machine power to drive the tool into the ground and complete large areas of aeration in a short period.
Large power aerators are quite expensive, and you will see these often used on golf courses. Smaller power aerators can be attached to your ride-on lawnmower.
For most people, it is not necessary to aerate your lawn each year. Most of the time, aeration is used for very compact soil that has had lots of foot or machine traffic. If you are finding that your soil is hard and not able to get the water and nutrients it needs, then aeration is a good choice.
There are a few key things you should look out for to know if your lawn is ready to be aerated. The first is to look at the color of the lawn. Sometimes if you notice large areas with poor color, it could be because the soil is too compact to penetrate the turf.
You may also notice water pooling in your lawn. This can happen naturally after heavy rain, but eventually, water should start to penetrate down; if it can’t, you may need to aerate that area of the grass.
Another sign to look out for is overall growth. If the lawns around you are all growing quickly and look healthy, and yours has completely stopped, this may mean that your lawn needs to be aerated. As always, if you are unsure, it is best to ask an expert.
If you have just completed an aeration of your lawn, you will want to make sure you do a few essential things to complete the process. For starters, you should water the turf and leave anything that was pulled on the turf. This material will start to decompose naturally, and it offers good nutritional benefits to your lawn.
You will then want to fertilize your lawn. While the holes are open, it is essential to let the fertilizer get down deep in the turf and start to help increase the current turf’s strength. If you feel as though your turf is a little thin, you can also add some seed when you have completed aerating. When the holes are open, seed can get into the proper areas and start to take root quicker than usual.
There is no question that aerating a lawn is a long and sometimes difficult process. If you are not going to do it yourself, chances are a local landscaping company will charge you hundreds of dollars to aerate your lawn.
This leaves many people wondering if there are alternatives to the lawn aeration process. Luckily there is a liquid product that can do virtually the same thing that physical aeration can do, and it will take only a fraction of the time and the cost as well!
A liquid aeration product like Eco Garden Liquid Lawn Aerator can help when your soil is too compact to accept fertilizer, water, and other nutrients. This product is simply sprayed on the lawn, and it will sink in much deeper than a typical manual or power aerator. You will find that your grass gets greener and stays stronger when using the Liquid Lawn Pro Aerator.
Instead of looking at the fall aeration process with dread, you can instead apply the Eco Garden PRO Lawn Aerator and be done within a matter of minutes. Let the product do the work, your back, and your wallet with thank you!
An aerator is used to make small holes or plugs in your lawn. When those holes are in place, more water, fertilizer, and seeds can get down to the level that they need and help increase the strength of your lawn. If you want green and healthy turf, aerating is a process that will need to happen from time to time. Save yourself lots of time and money by using a liquid aerator like our Eco Garden PRO Lawn Aerator. You will be surprised by the results that you can get with minimal effort.
]]>Not all ice melt products are safe for concrete. When selective a product to treat ice this winter, chose one that will not damage your driveway with excess rock salt.
]]>Every year, millions of homeowners accidentally damage their concrete through their deicing practices. With each freeze and thaw, driveways, sidewalks, and other concrete surfaces suffer the effects of the most popular choice for deicer.
Fortunately, you'll be glad to know that not only does ice melt safe for concrete exist, but it's also a better all-round product. This article will first run through why rock salt is not the product you should be using on your concrete surfaces, before laying out the reasons why calcium chloride ice melt is a much better choice for your concrete deicing needs.
It's common knowledge that rock salt (sodium chloride) is the most widely used deicing agent across most of Northern America. However, using it could actually be detrimental to the concrete you're spreading it over. That's not because the product is corrosive to concrete it of itself. Rather, it's to do with the practical working temperature of the product.
While from a distance, concrete looks like a smooth, solid surface, it's actually covered in millions of tiny pores. During the warmer summer months, you can even observe this effect by throwing water over the concrete and watching as the water drains away.
However, those pores become a big problem in the winter when using rock salt as your chosen deicing product. If the ice and snow on top of your concrete were to remain frozen, then there wouldn't be a problem. However, because having an icy driveway is incredibly dangerous to both you and your property, you're going to need to apply some form of deicer to make it safe.
The problem with rock salt specifically is its practical working temperature. While technically rock salt can work until -6°F, it loses its efficiency in between 15°F and 20°F (-6.67°C). The problem is that once the rock salt melts the snow and ice, it seeps through and saturates the concrete pores as described above.
While that process isn't a problem in the summer, in the winter, temperatures can drop significantly below those temperatures mentioned above, causing the rock salt and ice melt to freeze. When temperatures begin to rise again, the expanding ice exerts internal and upward pressure that causes it to crack, flake, and splinter. This process is known as "spalling" as poses a genuine threat to the integrity of your concrete surfaces.
With each freeze-thaw cycle throughout the winter, the damage will worsen, and before long, you could find yourself needing to carry out expensive repairs. To make things worse, rock salt is "hygroscopic," meaning that it attracts water to itself. Concrete saturated with frozen rock salt can hold up to 10% extra water within it, which is that much more potentially destructive pressure for your concrete driveway to bear.
However, there's no need to start panicking. There are plenty of suitable concrete-safe ice melt products available that work at much lower temperatures, reducing the number of freeze/thaw cycles in an average winter. The best on the market is calcium chloride pellets.
If you're wondering how to prevent the damage caused by using rock salt as a deicing product, then calcium chloride provides the best alternative. This deicer is much less harmful to the structural integrity of concrete because it has a practical working temperature that is much lower than that of sodium chloride (rock salt).
Calcium chloride pellets can work right down to a temperature of -25°F (-31.67°C). As a result, not only will you benefit from the fact that the product continues to work at such low temperatures, but it will also prevent most freeze-thaw cycles from taking place. Very rarely will overnight temperatures plummet below -25°F, which limits the number of times the ice will expand and exert pressure on your concrete driveways and walkways.
With the ice remaining as a brine liquid for most (if not all) of the winter season, you can rest assured that your concrete is being protected from damaging freeze-thaw cycles. The same is true of other porous household items such as pavers, roofs, and it affords better protection to asphalt driveways too.
One of the reasons why calcium chloride is so effective is because it's an "exothermic" compound. That is to say, when a pellet contacts water, the subsequent chemical reaction generates and expels heat. Such are its heat-generating characteristics; if you dropped a pound of calcium chloride in a gallon of water, it would increase the temperature by as much as 30°F.
That's why calcium chloride pellets keep working effectively in temperatures well below those of its counterparts. It generates heat and keeps ice in a liquid state, making it the best ice melt for concrete.
Another advantage that calcium chloride holds over rock salt is that you can apply much less. You are, therefore, much less likely to damage the concrete. Gone are the days where you have to pick up a shovel to continuously spread your rock salt all over your concrete driveway before you witness any noticeable difference.
Instead, just a few pounds of calcium chloride concrete-safe ice melt can have your driveway deiced in minutes. How is this possible, you ask? A lot of the reason it's so effective in such a small amount is its chemical. You see, as well as being exothermic, like traditional rock salt, calcium chloride is hygroscopic.
This chemical feature is a negative attribute of rock salt because of its much higher practical working temperature. However, it's a positive attribute in the case of calcium chloride. Once the product is spread across a concrete surface, it actually attracts moisture and generates the heat we mentioned above. This process creates a domino effect whereby the warm "brine" solution created continues to spread and melt everything else within reach. The result is that just one initial pellet can melt a sizable surface area as it continues to assimilate ice and snow into the rapidly-expanding brine.
Homeowners often cite price as the reason that they continue to use rock salt. There are no two ways about it; rock salt is the cheapest mass-produced deicer out there. However, given how much you have to apply, you're likely to end up spending far more on rock salt that you ever would if using calcium chloride ice melt.
To give you an example, if you were to use conventional rock salt (sodium chloride), you would usually apply five pounds per 100 square feet of driveway. However, when using calcium chloride ice melt, you would only use a fraction of that amount. Here at Eco Garden Solutions, we recommend an application of between one and four pounds of product per 500 square feet for our Eco Garden Chloride Ice Melt.
In real terms, that means even if you took our higher recommendation for application (four pounds per 500 square feet), you would apply 6.25 times less product to deice your driveway or walkways. At the lower end of our recommended application (one pound per 500 square feet), you would be applying a whopping 25 times less product. So, yes, while it's true that, pound-for-pound, calcium chloride is more expensive, using this type of ice melt safe for concrete will actually save you a considerable chunk of money.
There's another good reason you want to be applying less deicer, which relates to the chloride content.
Chloride is a substance that is necessary for the effective functioning of deicing products. However, it is not good for the environment. The problem is that there is no natural process by which chlorides are broken down, metabolized, taken up, or removed from the environment. Chloride is toxic to aquatic life, negatively impacts vegetation, and can harm wildlife too.
In a conventional rock salt compound, chloride can make up as much as 60% of the ions. The chloride makes its way into ecosystems through the runoff from rain, melting snow and ice, and through the splash and spray of vehicles driving on treated road surfaces. The more rock salt that is applied, the worse for the environment, so it makes sense to invest in alternative ice melt products that require you to use a lot less chloride.
There is another reason why chloride is an unwanted presence. When it comes into contact with certain materials, it can have a corrosive effect. As chloride-based deicer melts the ice and snow that it comes in contact with, the dissolved ice seeps into the cracks in concrete and asphalt where it may come in contact with reinforced steel or necessary pipework. Chloride reacts with the iron within the metal and causes it to corrode (rust).
Given just how much rock salt you have to apply to get it to work effectively as a deicer, it's only a matter of time before you could inadvertently end up corroding some of the critical infrastructure hidden beneath your concrete or asphalt driveway and walkways.
Lastly, by applying much less concrete-safe ice melt, you can rest assured that it won't leave significant unsightly salt stains come the spring. One of the most prominent issues with rock salt is the stains it leaves all over a driveway after a harsh winter. However, by using calcium chloride pellets, you can spread a fraction of the amount and avoid the same fate.
Hopefully, now you can understand that calcium chloride is an ice melt safe for concrete. It has a much lower risk of intensifying the freeze-thaw cycle like rock salt since it can work at much lower temperatures. That lower practical working temperatures prevent ice melt from refreezing and exerting pressure on concrete, causing spalling.
The exothermic and hygroscopic nature of this concrete-safe ice melt also means that you can apply a lot less of it, reducing the impact you have on the environment and decreasing the severity of any subterranean corrosion.
That's without mentioning the added benefits, such as the fact that is can melt snow and ice up to four times as fast as rock salt, and you only need to use up to 25 times less product to clear the same surface area as rock salt. The sphere-shaped calcium chloride prills are also pet-friendly, and they leave no leftover residue for you to track into your home.
So, where can you buy ice melt safe for concrete?
With cold winter temperatures already with us, now is the best time for you to stock up on your ice melting supplies before they really plummet. But this year, it's essential that you move away from using the traditional rock salt you've always relied on in the past. The chances are that by using it, you're actually doing more harm than good, especially if you have concrete driveways, walkways, and pavers. It's time you made the switch to the more effective, concrete-safe, and eco-friendly calcium chloride.
With industry-leading practical working temperatures going down to as low as -25°F, our Eco Garden Calcium Chloride Snow and Ice Melt allows you to protect yourself from potential injury without causing any unnecessary damage to your concrete. There's no more worrying about those freeze/thaw cycles, and you can rest easy knowing you're not contributing to the destruction of aquatic life, vegetation, and vital underground infrastructure such as pipework.
With fast, free shipping available on orders over $35 for a limited time only, why not stock on your supplies of calcium chloride ice melt before they sell out?
]]>How non corrosive is your ice melt? Would it be safe for concrete during the harsh winter months?
]]>While concrete and asphalt are very resistant to corrosion by deicing products, they are commonly damaged by improper use or the application of a deicer to concrete that is not strengthened. Concrete is incredibly resistant to scaling and damage if it is properly mixed, placed, and cured according to the recommendations of the American Concrete Institute. Having said that, it is still not recommended to apply a deicer to concrete that is less than 1 year old, has been precast, has exposed aggregate, has been stressed in the past, or chipped cracked, and weathered in any way. This is why we recommend waiting to apply the ice if your concrete is less than one year old, or using mechanical methods to remove the snow and ice.
As discussed above, the effective temperature of the deicer is the temperature at which it refreezes. This temperature will vary depending on the product, and the environmental conditions outside. For conventional rock salt, sodium chloride, or potassium chloride, that effective temperature will be in the range 20 -25 degrees Fahrenheit. This means that if the temperature outside drops below 20 degrees Fahrenheit, your ice melt will refreeze and potentially damage your concrete. Calcium chloride on the other hand, has the lowest effective temperature of all commercially available ice melt products. Calcium chloride will work down to -25 degrees Fahrenheit, substantially below that of other common deicers. This means that if you live in Northern or Northeastern regions of the United States as well as Central Midwest, calcium chloride ice melt should be the product of choice during deep winter conditions.
When people talk about non corrosive ice melt, they are typically referring to the amount of chloride that is in the product. As the deicer melts the ice and snow that it comes in contact with, the dissolved ice seeps into the cracks in concrete and asphalt where it may come in contact with the reinforced rebar, steel, or pipes. It is this action of the chloride that reacts with the iron in the metal, rusting the steel and causing the deicer to be “corrosive.” This is where not all commercially available deicers are made equal.
For a conventional rock salt or sodium chloride, the typical application is approximately 5 lb per 100 square feet of area. This is because rock salt requires a substantially higher application, to be effective. For a more environmentally friendly ice melt, like calcium chloride, the application rate is substantially lower. For example, for Eco Garden Calcium Chloride Ice Melt, We recommend applying at a rate of 1- 4 lbs Per 500 square feet. This means that even at the highest application rate recommended (4lbs per 500 sq.ft.), calcium chloride will apply not only 6.25 times less product, but also 6.25 times less chloride to your concrete or asphalt. At the lowest application rate (1 lb per 500 sq. ft.) you would be applying nearly 25 times less product per the same area, delivering 25 times less chloride. What this means for you, and your concrete or asphalt, is that applying a non corrosive ice melt like calcium chloride, is substantially better not only for your wallet, but also for the environment, and your concrete driveway.]]>